Emerson Thermostat Wiring: Everything You need to Know
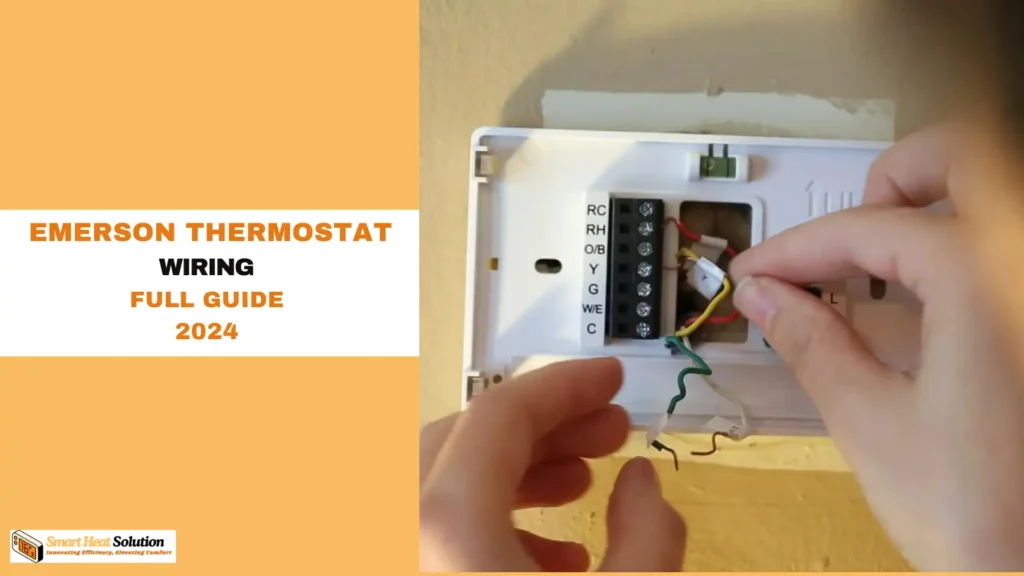
When I first decided to install my Emerson thermostat, I was overwhelmed by the wiring.
But once I got the hang of it, it was surprisingly straightforward.
In this guide, I’ll walk you through everything you need to know about Emerson thermostat wiring.
We’ll start by identifying the different wires and then move on to connecting them correctly.
By the end, you’ll have your thermostat up and running, keeping your home comfortable all year round. Let’s get started!
Introduction
First things first, Emerson thermostats are pretty straightforward to wire, but it’s important to do it right. Proper wiring ensures your HVAC system runs smoothly and efficiently. Let’s break it down step by step.
Preparation
Before you start, gather your tools:
- Screwdriver
- Wire stripper
- Pliers
- Emerson Thermostat
- Wiring diagram (if available)
Safety first: Always turn off the power to your HVAC system at the circuit breaker before you start.
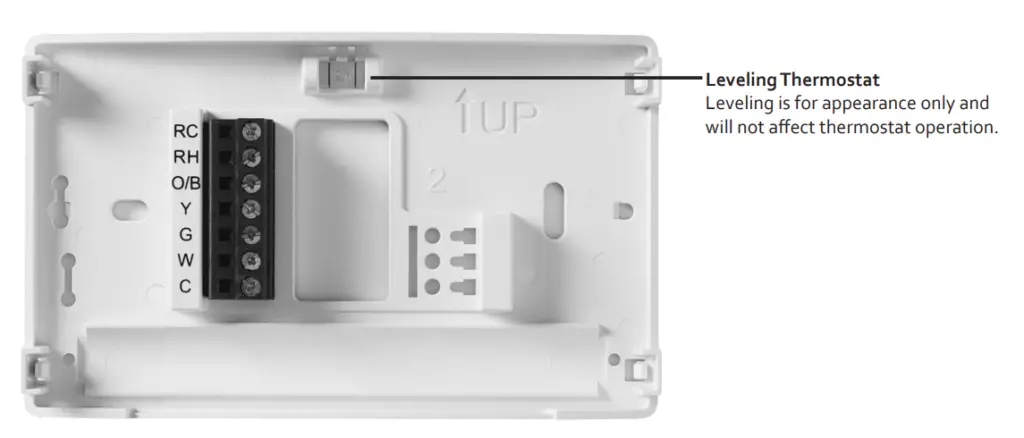
Understanding wiring colors and terminals is crucial. Here’s a quick rundown:
- R: Power (usually red)
- W: Heat (usually white)
- Y: Cooling (usually yellow)
- G: Fan (usually green)
- C: Common (usually blue or black)
Wiring Diagrams
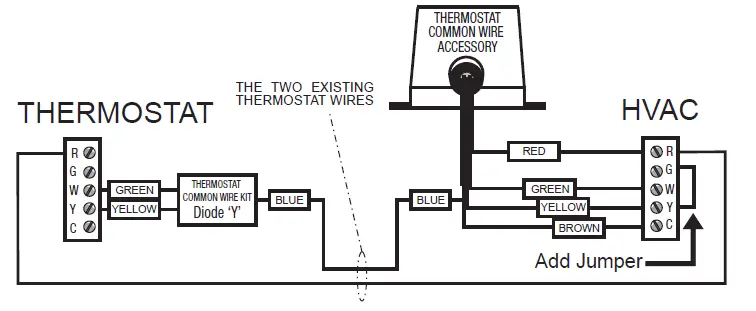
A general wiring diagram for Emerson thermostats looks something like this:
- R to R
- W to W
- Y to Y
- G to G
- C to C
Wiring Diagram Table
Here’s a quick reference table for common wiring configurations:
| Wire Color | Function | Terminal |
|---|---|---|
| Red (R) | Power | R |
| White (W) | Heat | W |
| Yellow (Y) | Cooling | Y |
| Green (G) | Fan | G |
| Blue/Black (C) | Common | C |
| Orange (O/B) | Reversing Valve | O/B |
For specific systems, you might need different diagrams:
- Heat pump: Additional wires for reversing valve (O/B)
- Furnace: Might not need a C wire
- Air conditioner: Standard wiring
- Dual fuel system: Combination of heat pump and furnace wiring
Step-by-Step Guide
Turning Off Power
Always start by turning off the power to your HVAC system. Safety is key here.
Removing the Old Thermostat
- Remove the cover of the old thermostat.
- Take a picture of the current wiring setup.
- Disconnect the wires and label them if needed.
- Remove the old thermostat from the wall.
Connecting Wires to the Emerson Thermostat
- Match the wires to the corresponding terminals on the Emerson thermostat.
- Use your wire stripper to expose about 1/2 inch of wire.
- Insert the wires into the terminals and tighten the screws.
Mounting the Thermostat
- Mount the base plate to the wall using screws.
- Attach the Emerson thermostat to the base plate.
- Make sure everything is secure.
Turning On Power and Testing
- Turn the power back on at the circuit breaker.
- Test the Emerson thermostat by adjusting the temperature and checking if the HVAC system responds.
Facts and Figures
- Energy Savings: According to the U.S. Department of Energy, programmable thermostats can save up to 10% a year on heating and cooling costs.
- Smart Features: Many Emerson thermostats now come with smart features like voice control compatibility with Amazon Alexa and Google Assistant.
- Warranty: Emerson offers warranties ranging from 1 to 5 years, depending on the model, providing peace of mind for your investment.
Latest Models
- Emerson Sensi Touch: Features a touchscreen display, Wi-Fi connectivity, and compatibility with smart home systems.
- Emerson Sensi: A more affordable option with Wi-Fi connectivity and programmable settings.
- Emerson Blue: A basic model that’s easy to use and install, perfect for straightforward HVAC systems.
Compatibility and Additional Features
Emerson thermostats are compatible with a wide range of HVAC systems. Make sure to check the manual for specific compatibility details.
Additional features might include:
- Programmable settings
- Wi-Fi connectivity
- Energy-saving modes
Advanced Wiring Tips
Handling Multiple Wires
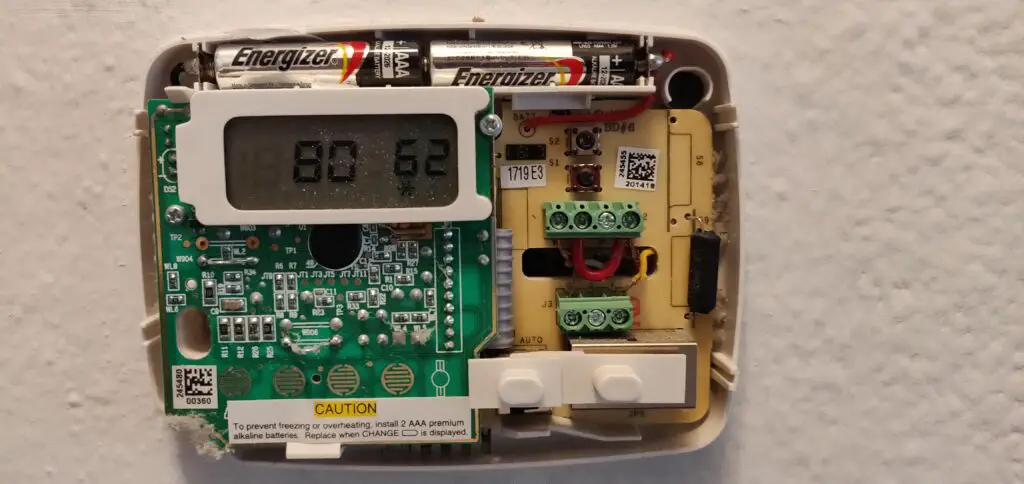
Sometimes you might find multiple wires bundled together. Here’s what to do:
- Identify the function: Use a multimeter to check which wires are live.
- Label them: Use tape or labels to mark each wire.
- Connect carefully: Ensure each wire is securely connected to the correct terminal on the Emerson thermostat.
Dealing with No C Wire
If your system doesn’t have a C wire, you have a couple of options:
- Use an adapter: Some adapters can provide the necessary power.
- Install a C wire: This might require running a new wire from your HVAC system to the thermostat.
Wiring for Dual Fuel Systems
Dual fuel systems combine a heat pump and a furnace. Here’s how to wire it:
- Connect the heat pump wires (usually O/B and Y) to the corresponding terminals.
- Connect the furnace wires (usually W and R) to the corresponding terminals.
- Ensure the C wire is connected for continuous power.
Troubleshooting Common Issues
No Power to the Thermostat
If your Emerson thermostat isn’t getting power, try these steps:
- Check the C wire: Ensure it’s properly connected.
- Inspect the fuse: Sometimes the fuse in the HVAC system can blow.
- Verify the circuit breaker: Make sure it’s not tripped.
Heating or Cooling Not Working
If your heating or cooling isn’t functioning, here’s what to do:
- Check the W and Y wires: Ensure they are securely connected.
- Test the HVAC system: Sometimes the issue might be with the HVAC system itself.
- Reset the thermostat: A simple reset can sometimes fix the problem.
Fan Not Running
If the fan isn’t working, follow these steps:
- Check the G wire: Ensure it’s properly connected.
- Inspect the fan: Make sure the fan itself is functioning.
- Test the thermostat settings: Ensure the fan setting is set to “On” or “Auto”.
Additional Features and Compatibility
Programmable Settings
Emerson thermostats often come with programmable settings. Here’s how to use them:
- Set schedules: Program your thermostat to adjust temperatures at specific times.
- Use energy-saving modes: These modes can help you save on energy bills.
- Monitor usage: Some models allow you to track your energy usage.
Wi-Fi Connectivity
If your Emerson thermostat has Wi-Fi connectivity, here’s how to set it up:
- Connect to Wi-Fi: Follow the instructions in the manual to connect your thermostat to your home Wi-Fi.
- Use the app: Download the corresponding app to control your thermostat from your phone.
- Set up alerts: Get notifications for temperature changes or system issues.
Real-Life Example
Let me share a quick story. A friend of mine recently installed an Emerson thermostat but ran into trouble with the C wire. After checking the wiring diagram and using a multimeter, he realized the C wire was missing. He ended up installing an adapter, and voila, the thermostat worked perfectly.
Final Thoughts
Emerson Thermostat Wiring doesn’t have to be a headache. With the right tools, a bit of preparation, and this guide, you’ll have your thermostat up and running in no time. Stay safe, follow the steps, and enjoy your newly wired Emerson thermostat.
FAQs
What if my wires don’t match the colors mentioned?
Don’t worry, the colors can vary. The important thing is to match the function of the wire (heat, cooling, power, etc.) to the correct terminal on the Emerson thermostat.
Do I need a C wire?
The C wire provides continuous power to the thermostat. If your system doesn’t have one, you might need an adapter or a different wiring solution.
Can I wire an Emerson thermostat myself?
Absolutely, with the right tools and this guide, you can wire an Emerson thermostat yourself. Just make sure to follow safety precautions and double-check your connections.

I’m Alan William’s, the founder of SmartHeatSolution.com. I am from California, USA, I’m passionate about innovative heating technologies and their impact on our homes and businesses. With a background in electrican and home repair , I aim to make smart, energy-efficient heating accessible to everyone. When I’m not writing, I’m likely interested in all the thermostat brands and their new technnology. Thanks for stopping by!

