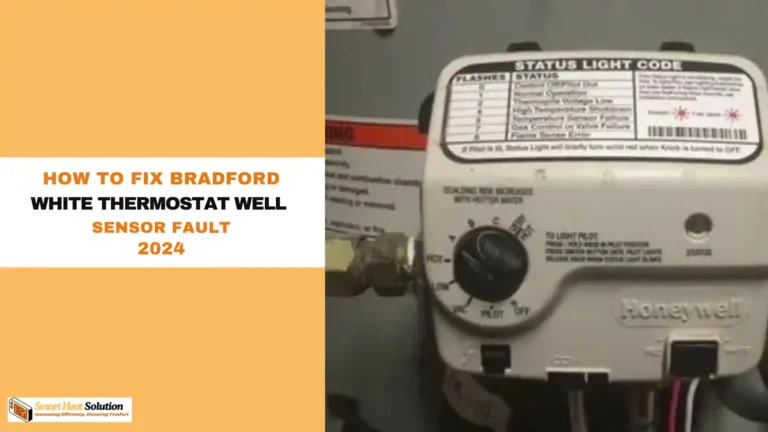
Honeywell Purge Light Blinking? [Causes & Solutions]
![Honeywell Purge Light Blinking? [Causes & Solutions] 1 Honeywell Purge Light Blinking? [Causes & Solutions]](https://smartheatsolution.com/wp-content/uploads/2024/10/tinywow_2_66209135.webp)
If you’re the proud owner of a Honeywell thermostat or HVAC system, you may have encountered a blinking purge light at some point.
This common occurrence can be a source of confusion and concern for homeowners, especially when it’s not immediately clear what it means or how to resolve it. In this blog post, we’ll delve into the causes of a blinking purge light, what it indicates about your heating and cooling system, and the steps you can take to solve the issue.
What Does the Purge Light Indicate?
![Honeywell Purge Light Blinking? [Causes & Solutions] 2 What Does the Purge Light Indicate](https://smartheatsolution.com/wp-content/uploads/2024/10/tinywow_3_66209137.webp)
The purge light is a diagnostic feature on Honeywell heating systems, usually associated with gas-fired furnaces and boilers. When this light blinks, it typically indicates that the system is going through a purge cycle.
The purge cycle is a safety feature designed to remove any residual gas from the combustion chamber before ignition. This process ensures that the furnace can operate safely and efficiently, reducing the risk of dangerous gas buildup and ensuring optimal combustion.
Reasons for a Blinking Purge Light
A blinking purge light can signal various issues. Understanding these potential causes can help you identify whether you need to take action or call a professional. Here are some common reasons for a blinking purge light:
Understanding the Purge Cycle:
- Purging the Heating System: The purge cycle is an essential process that removes combustion byproducts from your heating system. This ensures the system runs efficiently and safely.
- System Diagnostics: A blinking purge light may also indicate that the system is running a diagnostic check or attempting to adjust to changes in the internal environment.
- Safety Protocol: In some cases, a blinking purge light can suggest that there’s a fault in the system or that safety protocols are being activated. This could be due to issues like overheating or improper airflow.
Common Reasons for Honeywell Purge Light Blinking
Extended Purge Cycle
An extended purge cycle is a frequent cause of the blinking light. This can happen when:
- The system detects residual gases.
- There’s debris or a clog in the HVAC system.
- There’s insufficient airflow.
Solution: You may need to reset your system or schedule regular maintenance to prevent airflow issues.
Faulty Flame Sensor
A malfunctioning flame sensor can cause the purge light to blink. The flame sensor’s role is to detect whether the furnace is lit. If it’s dirty or faulty, it could fail to recognize the flame, resulting in an extended or incomplete purge cycle.
Solution: Clean or replace the flame sensor as needed. Ensure the sensor is free of dust and corrosion.
Blocked Venting
A blocked vent could cause the system to struggle during the purge cycle, which triggers the blinking light. Blockages could be due to external debris like leaves or internal build-ups within your ducts.
Solution: Inspect your vents and ensure they are clear of any obstructions. Regular duct cleaning is recommended.
Normal Operation: In many cases, a blinking purge light means that the furnace is working correctly and is merely in the process of purging itself before it ignites.
Faulty Limit Switch: A defective or tripped limit switch can prevent the heating system from operating correctly, triggering the purge light to blink as a warning.
Electrical Issues: Wiring problems or electrical shorts may cause the control board to malfunction, leading to inconsistent signals and a blinking purge light.
Faulty Pressure Switch: If the pressure switch is malfunctioning or stuck, the furnace’s safety sequence may be interrupted, causing the purge light to blink.
How to Troubleshoot Honeywell Purge Light Issues
![Honeywell Purge Light Blinking? [Causes & Solutions] 3 Troubleshoot Honeywell Purge Light Issues](https://smartheatsolution.com/wp-content/uploads/2024/10/tinywow_4_66209140.webp)
Step 1: Check for Vent Blockages
The first step is to inspect your vents and ducts for any blockages. If you notice dirt or debris clogging them, clean them out to restore proper airflow.
Step 2: Inspect the Flame Sensor
Locate the flame sensor in your system and visually inspect it for any dirt or signs of wear. If it looks corroded, it’s time to clean or replace it. Use fine-grit sandpaper to gently clean the sensor, then reinstall it and test the system.
Step 3: Reset Your Thermostat
Sometimes, a system reset can resolve the blinking purge light. Turn off your HVAC system, wait for a few minutes, then restart it. This may clear any internal errors causing the light to blink.
Step 4: Schedule Professional Maintenance
If these basic steps don’t resolve the issue, it’s time to call in a professional HVAC technician. There could be deeper issues with your system, such as an airflow sensor failure or a malfunctioning control board.
Honeywell Purge Light Diagram in HVAC Systems
graph TD;
A[HVAC System] –> B[Purge Cycle Starts];
B –> C{Purge Light Blinking};
C –> D[Normal: Stops After Purge];
C –> E[Abnormal: Continues Blinking];
E –> F[Check Flame Sensor];
E –> G[Check Vents for Blockages];
E –> H[Reset Thermostat];
E –> I[Call HVAC Technician];
Preventive Maintenance for Your Honeywell Thermostat
Ensuring that your Honeywell thermostat and HVAC system remain in optimal condition can prevent future issues with the purge light. Here are some best practices:
- Regular Filter Changes: Dirty filters can reduce airflow, affecting the efficiency of the purge cycle. Check and replace your filters every 1-3 months.
- Annual HVAC Inspections: Have a professional inspect your system at least once a year to catch potential problems early.
- Keep Vents Clear: Always ensure that your vents are free from obstructions to promote proper airflow.
- Monitor Flame Sensors: Keep an eye on your flame sensor and clean it annually to prevent it from malfunctioning.
Conclusion
The blinking purge light on your Honeywell thermostat shouldn’t be ignored. While it might be a minor issue, such as a dirty flame sensor or blocked vent, it could also signal a more significant problem with your HVAC system. Following the troubleshooting steps we’ve outlined will help you resolve the issue and keep your home comfortable. If you can’t fix it yourself, don’t hesitate to call in a professional.
By maintaining your system regularly and addressing small issues before they escalate, you can avoid unnecessary disruptions and ensure your thermostat functions efficiently year-round.
![Honeywell Purge Light Blinking? [Causes & Solutions] 4 Alan William's](https://smartheatsolution.com/wp-content/uploads/2024/09/premium_photo-1689568158814-3b8e9c1a9618-scaled.avif)
I’m Alan William’s, the founder of SmartHeatSolution.com. I am from California, USA, I’m passionate about innovative heating technologies and their impact on our homes and businesses. With a background in electrican and home repair , I aim to make smart, energy-efficient heating accessible to everyone. When I’m not writing, I’m likely interested in all the thermostat brands and their new technnology. Thanks for stopping by!

![What is O or B Orientation On Nest Heat Pump? [A Switch] 8 What is O or B Orientation On Nest Heat Pump? [A Switch]](https://smartheatsolution.com/wp-content/uploads/2024/09/tinywow_Business-2_64019743-768x432.webp)
