How to Open And Remove a Honeywell Thermostat Cover From the Wall
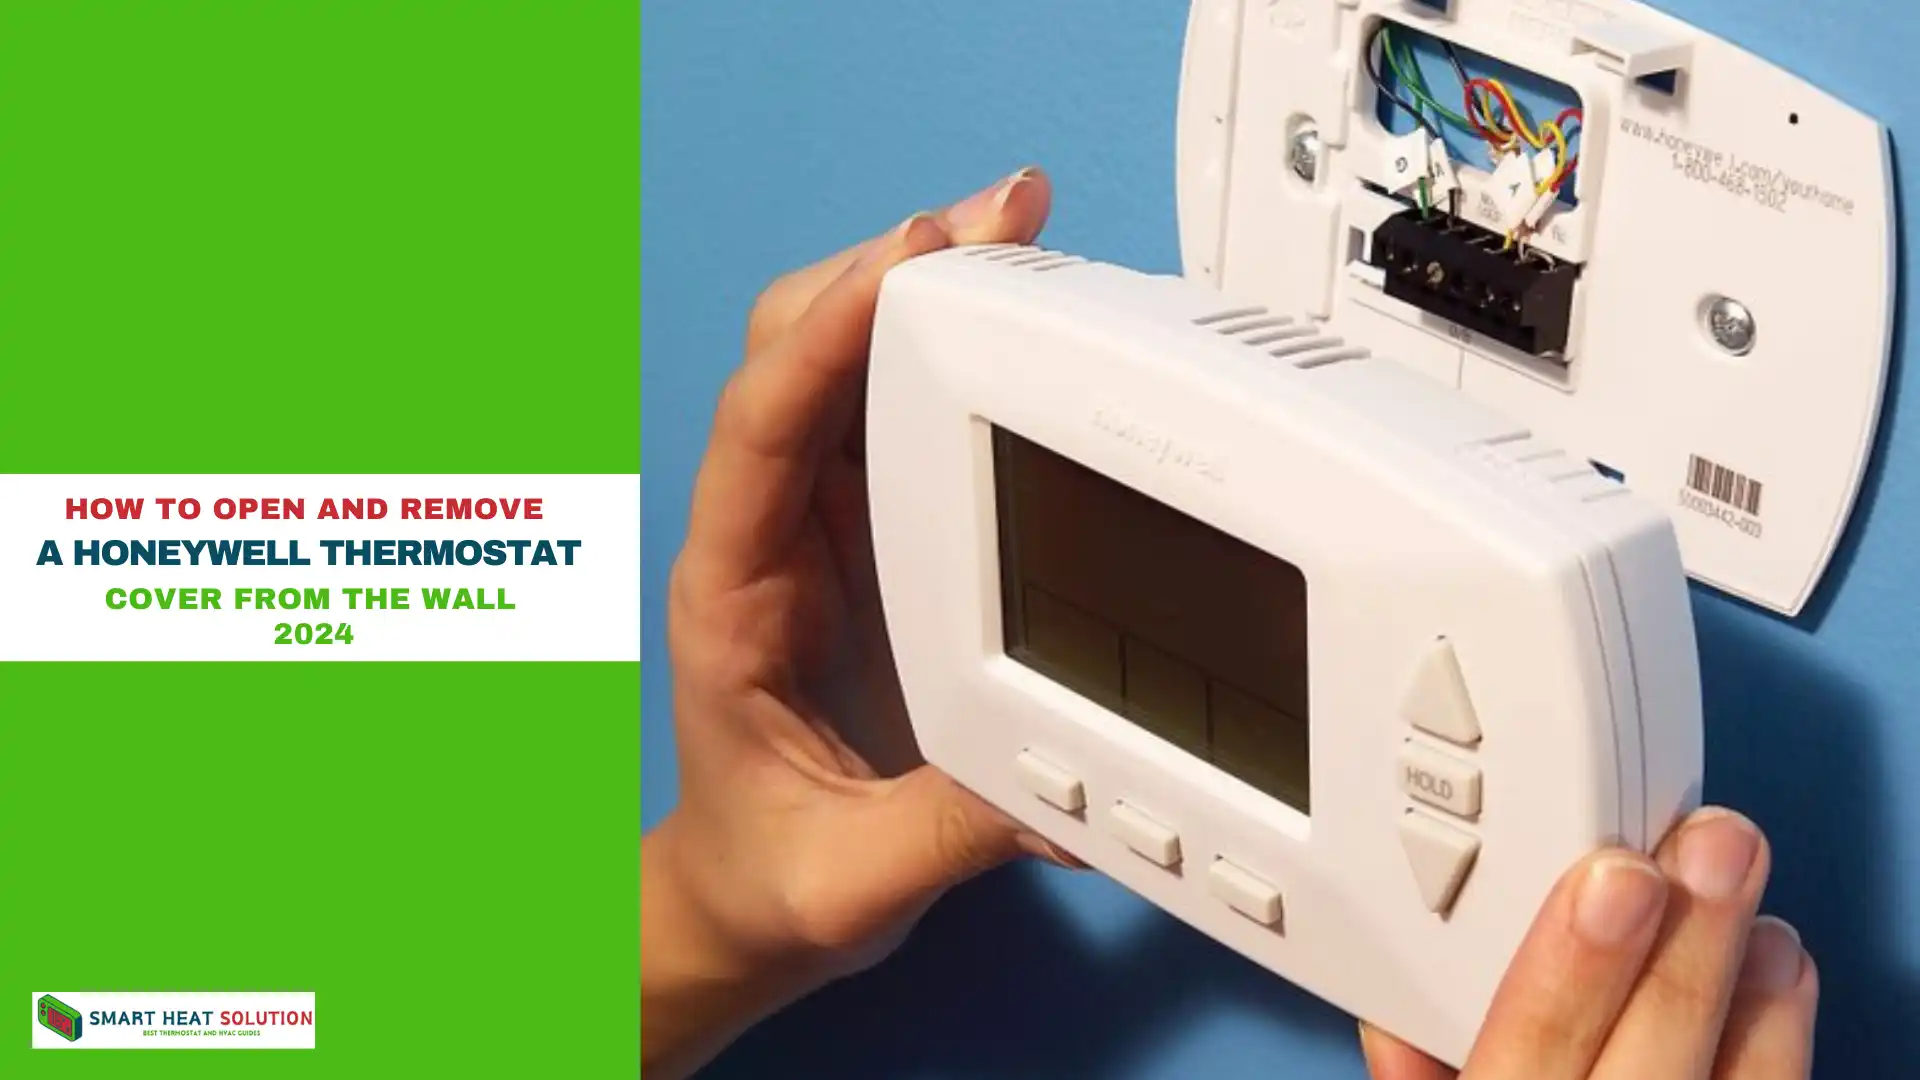
If you are looking to replace or service your Honeywell thermostat, one of the first steps is to remove the cover from the wall.
This process can seem hard if you’ve never done it before, but with the right approach, it’s fairly straightforward.
In this blog post, i will guide you through the process of safely removing your Honeywell thermostat cover.
Understanding Your Honeywell Thermostat
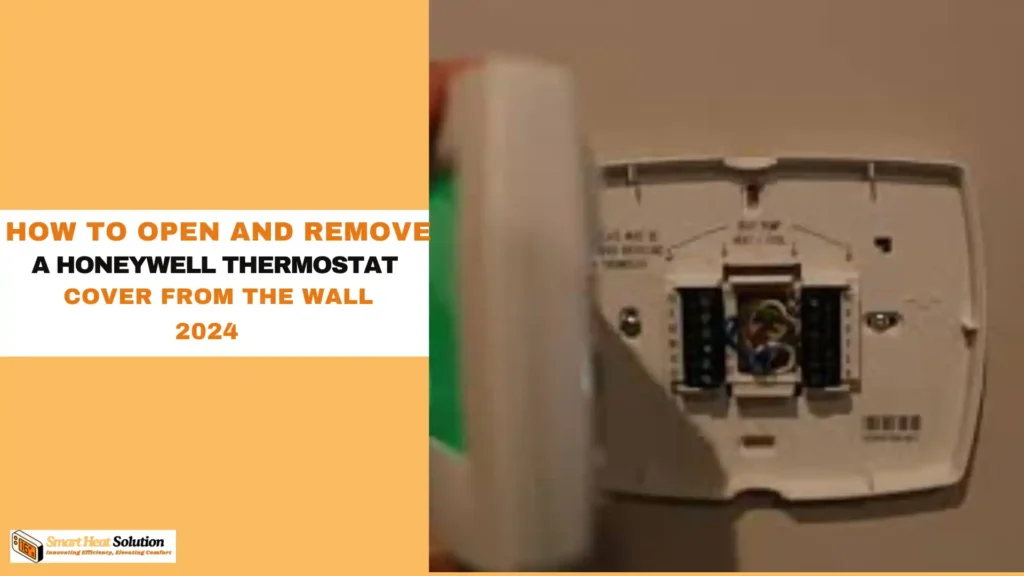
Honeywell offers a wide variety of thermostat models, each designed to cater to different household heating and cooling needs.
Though the specifics may vary from model to model, most Honeywell thermostats share a similar approach to removing their covers. Before diving into the removal process, you should identify your thermostat model. Common models include:
- Honeywell RTH9585WF
- Honeywell RTH9585
- Honeywell RTH6580WF
Once you know your model, you can follow the steps below.
Why Remove the Thermostat Cover?
Before we get started, let’s discuss why you might want to remove your thermostat cover. Common reasons include:
- Replacing the battery in battery-operated models.
- Changing the thermostat to a new model.
- Servicing or cleaning the internal components.
- Accessing wiring for HVAC maintenance.
Now that we understand the importance of this task, let’s dive into the steps to take.
Tools You May Need
Before you begin, gather the following tools to ensure a smooth process:
- Flathead or Phillips screwdriver (depending on your thermostat model)
- Utility knife (optional)
- A non-contact voltage tester (for safety)
- Soft cloth (for cleaning)
Step-by-Step Instructions
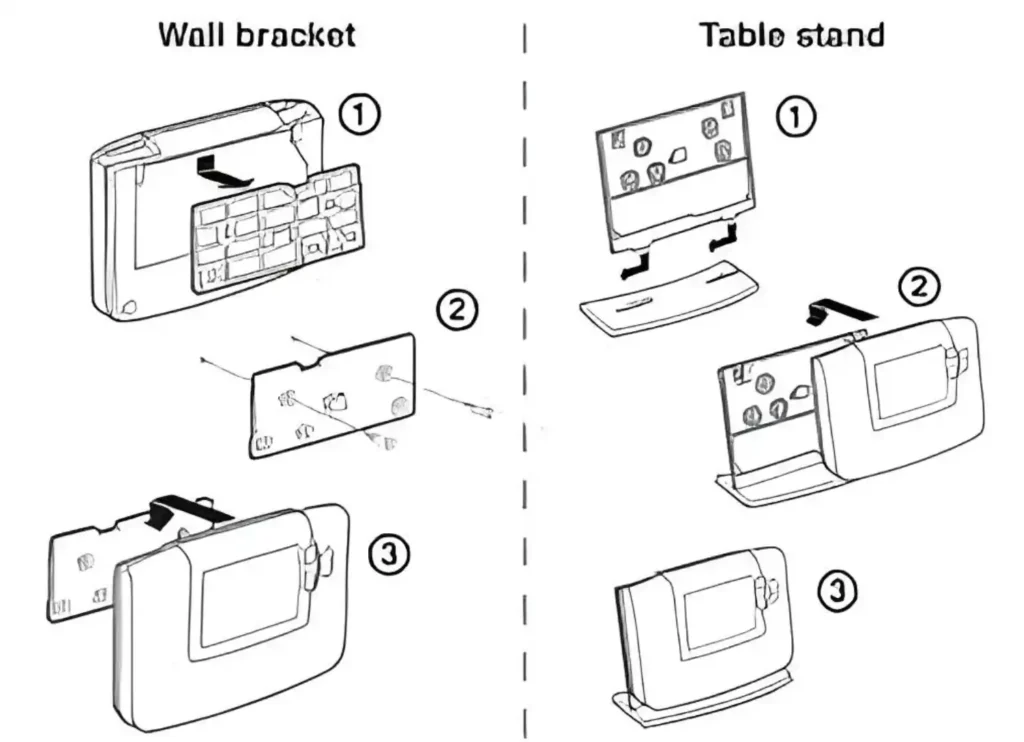
Step 1: Power Down the System
Safety should always come first. It’s crucial to turn off the power to your thermostat:
- Locate the circuit breaker for your HVAC system and switch it off.
- Use a non-contact voltage tester to ensure that there is no power reaching the thermostat.
Step 2: Identify Your Honeywell Thermostat Model
Honeywell produces a variety of thermostat models, and the method to remove the cover may differ slightly depending on your specific unit. Common models include the Honeywell RTH, and older mechanical thermostats may be different. Check your user manual or the model number on the device for specifications.
Step 3: Remove the Cover
Depending on your Honeywell model, the method to remove the cover can vary:
For Clip-On Models (like the RTH series):
- Grip the bottom edges of the thermostat firmly but gently.
- Pull the cover away from the base while applying slight pressure to unclip it. Be careful not to apply too much force, as this could damage the unit.
For Screw-On Models:
- Locate the screws at the top or bottom of the thermostat. You may find a cover plate that needs to be removed first.
- Use a screwdriver to loosen and remove the screws. Keep these screws in a safe place as you will need them later.
- Carefully pull the cover off the base.
Step 4: Inspect and Clean
Once the cover is removed, take a moment to inspect the internal components:
- Clean Dust and Debris: Use a soft cloth to wipe away dust and dirt that may have accumulated on the thermostat’s internals.
- Replace Batteries: If your model requires batteries, now is a great time to replace them.
- Check Wiring Connections: Ensure that all connections are secure. If you’re changing the thermostat entirely, note the color-coding of the wires for the new installation.
Step 5: Reattach the Cover
If you have completed your task and wish to reattach the thermostat cover:
- Align the cover with the base plate of the thermostat.
- If it is a screw-on model, secure it with the screws you removed earlier. For clip-on models, firmly press down until you feel it snap back into place.
- Restore power to the device by switching the circuit breaker back on.
Why Open Your Honeywell Thermostat Cover?
Before diving into the step-by-step guide, it’s essential to understand why you might need to open your thermostat cover:
- Battery Replacement: Many Honeywell thermostats operate on batteries, and opening the cover is necessary to replace them.
- Cleaning and Maintenance: Dust can accumulate inside the unit, impacting performance.
- Troubleshooting: If your thermostat displays error codes or isn’t functioning correctly, accessing the internal components can help with repairs or replacements.
- Wiring Adjustments: For those who install or repair thermostats, wiring adjustments may require the cover to be removed.
Now, let’s explore how to safely open a Honeywell thermostat cover.
Steps to Open Different Honeywell Thermostat Models
Honeywell offers a wide variety of thermostat models, and each may have slightly different opening mechanisms. Here, we’ve categorized the steps based on popular Honeywell models, providing clear instructions for each type.
1. Slide-Off Honeywell Thermostat Covers
Some Honeywell thermostat models, particularly older analog units, feature a slide-off cover. These covers are straightforward to open, but it’s essential to avoid using excessive force.
Steps to Open a Slide-Off Thermostat Cover:
- Turn Off Power: For safety, switch off the power to your thermostat from the circuit breaker.
- Locate the Grooves or Notches: Check the top or sides of the thermostat cover for small grooves, indicating where the cover slides off.
- Slide the Cover: Firmly hold the thermostat base with one hand. With the other, gently pull or slide the cover in the direction indicated by the notches, usually upward or to the side.
- Remove the Cover Completely: Once it’s loosened, remove the cover entirely, exposing the internal components.
2. Snap-On Honeywell Thermostat Covers
Snap-on covers are more common in Honeywell digital models. These covers are designed to pop off with a little pressure.
Steps to Open a Snap-On Thermostat Cover:
- Turn Off the Power: Start by turning off the power at the circuit breaker to avoid electric shocks.
- Identify Pressure Points: Look for slight indentations or edges on the sides or bottom of the thermostat cover.
- Apply Pressure: Place your fingers on either side of the thermostat and apply gentle pressure to snap off the cover.
- Lift the Cover Away: After you feel it snap, carefully pull it away from the base.
Note: When handling snap-on covers, be gentle to avoid breaking the plastic clips.
3. Screw-On Honeywell Thermostat Covers
For Honeywell models with a more secure design, the cover may be fastened with screws. This is common in more advanced models that need additional stability.
Steps to Open a Screw-On Thermostat Cover:
- Turn Off the Power: Safety first – ensure the power is turned off at the circuit breaker.
- Locate the Screws: Look around the thermostat cover, usually at the bottom or sides, for small screws.
- Use the Correct Screwdriver: A Phillips or flat-head screwdriver is typically required to remove these screws.
- Remove the Screws: Unscrew carefully, setting each screw aside to avoid losing them.
- Gently Pull the Cover Away: Once all screws are removed, gently pull the cover away from the wall to access the internal parts.
Tip: Some newer Honeywell models have hidden screws, often concealed by a small cover plate, which you may need to remove before accessing the screws.
What to Do After Opening the Thermostat Cover
Once you have successfully opened your Honeywell thermostat cover, follow these steps to complete your intended maintenance or troubleshooting.
1. Battery Replacement
Honeywell thermostats typically require AA or AAA batteries. Look for the battery compartment and remove the old batteries, replacing them with fresh ones of the same type. Be sure to follow the positive (+) and negative (-) indications in the compartment.
2. Cleaning the Interior
Dust accumulation can interfere with thermostat sensors. Use a soft brush or compressed air to clean around the components, especially if you notice dirt on the temperature sensor or other visible parts.
3. Inspect Wiring Connections
If you’re troubleshooting wiring issues, check each wire connection for loose or frayed wires. Each wire should be firmly attached to its terminal. If you spot a loose connection, you may need to use a small screwdriver to re-secure it.
Note: Always consult the Honeywell manual or contact a professional if you need clarification on handling thermostat wiring.
4. Check the Display and Temperature Sensor
If your thermostat isn’t displaying correctly or shows temperature inaccuracies, opening the cover lets you inspect these components. Ensure the display screen has no cracks and that the temperature sensor appears clean and undamaged.
Common Honeywell Thermostat Models and Their Cover Types
Below is a quick reference table that outlines various Honeywell thermostat models and their corresponding cover types.
| Honeywell Model | Cover Type | Opening Mechanism |
|---|---|---|
| Honeywell T87 Series | Slide-Off | Slide up or down |
| Honeywell Pro Series | Snap-On | Apply light pressure |
| Honeywell RTH2300/RTH221B | Screw-On | Phillips screws |
| Honeywell 9000 Series | Snap-On | Gently pull sides |
| Honeywell Lyric T5/T6 | Screw-On | Screws under faceplate |
Important Notes
- Always remember which model you have. This knowledge can save you a lot of trouble if you need specific parts or assistance.
- Consider taking photos. If you worry about reconnecting wires later, a quick snap can help you remember exactly how everything is arranged.
Frequently Asked Questions (FAQs)
What if my thermostat cover is stuck?
If you’re struggling to remove the cover, double-check for screws or hidden clips that may be holding it tightly in place. Be gentle and avoid using excessive force, as this may damage the unit.
Can I remove the thermostat cover without turning off power?
While it’s technically possible, it is not advisable. Turning off the power prevents potential electrical shocks or damage to the thermostat.
Is it normal to have dust inside the thermostat?
Yes, it is common for thermostats to collect dust over time. Regular maintenance is encouraged to enhance efficiency and longevity.
Can I replace the cover if I lose it?
Yes, you can often buy replacement covers from Honeywell or authorized dealers. Make sure to get the correct model to ensure a proper fit.
Why is My Honeywell Thermostat Cover Stuck?
If your Honeywell thermostat cover feels stuck, here are a few reasons why:
Old adhesive: Over time, the adhesive used to secure the cover can become sticky or hard, making it tough to remove.
Clips or screws not fully released: Double-check if all clips or screws are completely undone.
Incorrect technique: Using the wrong tools or methods can also cause issues.
To resolve this, make sure you’re using the right tools and methods for your specific Honeywell model. For models with clips, use a flathead screwdriver to gently pry the cover away.
What If I Break a Clip While Removing the Cover?
Breaking a clip can be frustrating, but it’s not the end of the world:
Replacement clips: Check with Honeywell or your local hardware store for replacement clips.
Temporary fix: You can use a bit of tape or a makeshift clip to hold the cover in place until you get a proper replacement.
Be cautious when prying off the cover to avoid breaking any clips or damaging the thermostat.
Can I Remove a Honeywell Thermostat Cover Without Turning Off the Power?
It’s strongly recommended to turn off the power before removing the Honeywell thermostat cover. Here’s why:
Safety: Working with electrical components without turning off the power can be dangerous.
Avoiding damage: Powering off prevents the risk of damaging the thermostat or causing a short circuit.
If you’re unsure about turning off the power, consult a professional or refer to your thermostat’s manual for guidance.
How Can I Tell If My Honeywell Thermostat Needs New Batteries?
If your Honeywell thermostat cover is off, here’s how to check if it needs new batteries:
Check the display: If the display is blank or faint, it’s a sign the batteries might be low.
Error messages: Some models display a low battery warning or error message.
Replacing the batteries while you have the cover off is a good practice. It ensures your thermostat runs smoothly without interruptions.
What Should I Do If the Thermostat Cover Doesn’t Fit Back Properly?
If your Honeywell thermostat cover doesn’t fit back on correctly:
Check for obstructions: Make sure no wires or components are blocking the cover.
Align the cover: Ensure the cover is aligned properly with the base before securing it.
Recheck your work to ensure everything is in place before restoring power to the thermostat.
Is It Necessary to Remove the Thermostat Cover for Routine Maintenance?
While not always necessary, removing the thermostat cover can be beneficial for routine maintenance:
Cleaning: Dust and debris can affect the thermostat’s performance. Removing the cover allows for thorough cleaning.
Battery checks: Regular battery checks and replacements can prevent issues.
Routine maintenance helps keep your Honeywell thermostat in top condition, so it’s worth considering.
Where Can I Find More Help with My Honeywell Thermostat?
If you need additional help with your Honeywell thermostat:
Honeywell Support: Visit the Honeywell support page for detailed guides and troubleshooting tips.
Online tutorials: Look up video tutorials for a visual guide on removing and reinstalling the thermostat cover.
By using these resources, you can get step-by-step assistance and answers to any specific questions you may have.
Conclusion
Removing the cover of your Honeywell thermostat is a manageable task that aids in maintaining your home’s heating and cooling system. By following the steps outlined above, you will not only build your confidence as a DIY homeowner but also empower yourself to handle similar tasks in the future.
Regardless of whether you have a clip-on or screw-on model, knowing how to access the inner workings of your thermostat is an invaluable skill.
As you undertake this task, remember to take your time, follow safety precautions, and don’t hesitate to seek help if you need it. With patience and practice, what seems like a challenge today will feel like second nature tomorrow.

I’m Alan William’s, the founder of SmartHeatSolution.com. I am from California, USA, I’m passionate about innovative heating technologies and their impact on our homes and businesses. With a background in electrican and home repair , I aim to make smart, energy-efficient heating accessible to everyone. When I’m not writing, I’m likely interested in all the thermostat brands and their new technnology. Thanks for stopping by!

