Nest Thermostat No Heat Option (Easy Fixes)
When your Nest Thermostat is not showing the heat option, it’s a frustrating issue—especially when you rely on it for accurate and consistent control of your HVAC system.
Let’s dig into the possible causes behind this issue and explore effective troubleshooting solutions.
This guide will cover everything you need to know to get your thermostat functioning as expected, including wiring, compatibility checks, and specific troubleshooting steps for common scenarios.
Common Causes for Missing Heat Option on Your Nest Thermostat
Understanding why the heat option might be missing from your Nest Thermostat can significantly simplify troubleshooting and reduce downtime. Here are the most frequent reasons this issue occurs:
1. Wiring Issues
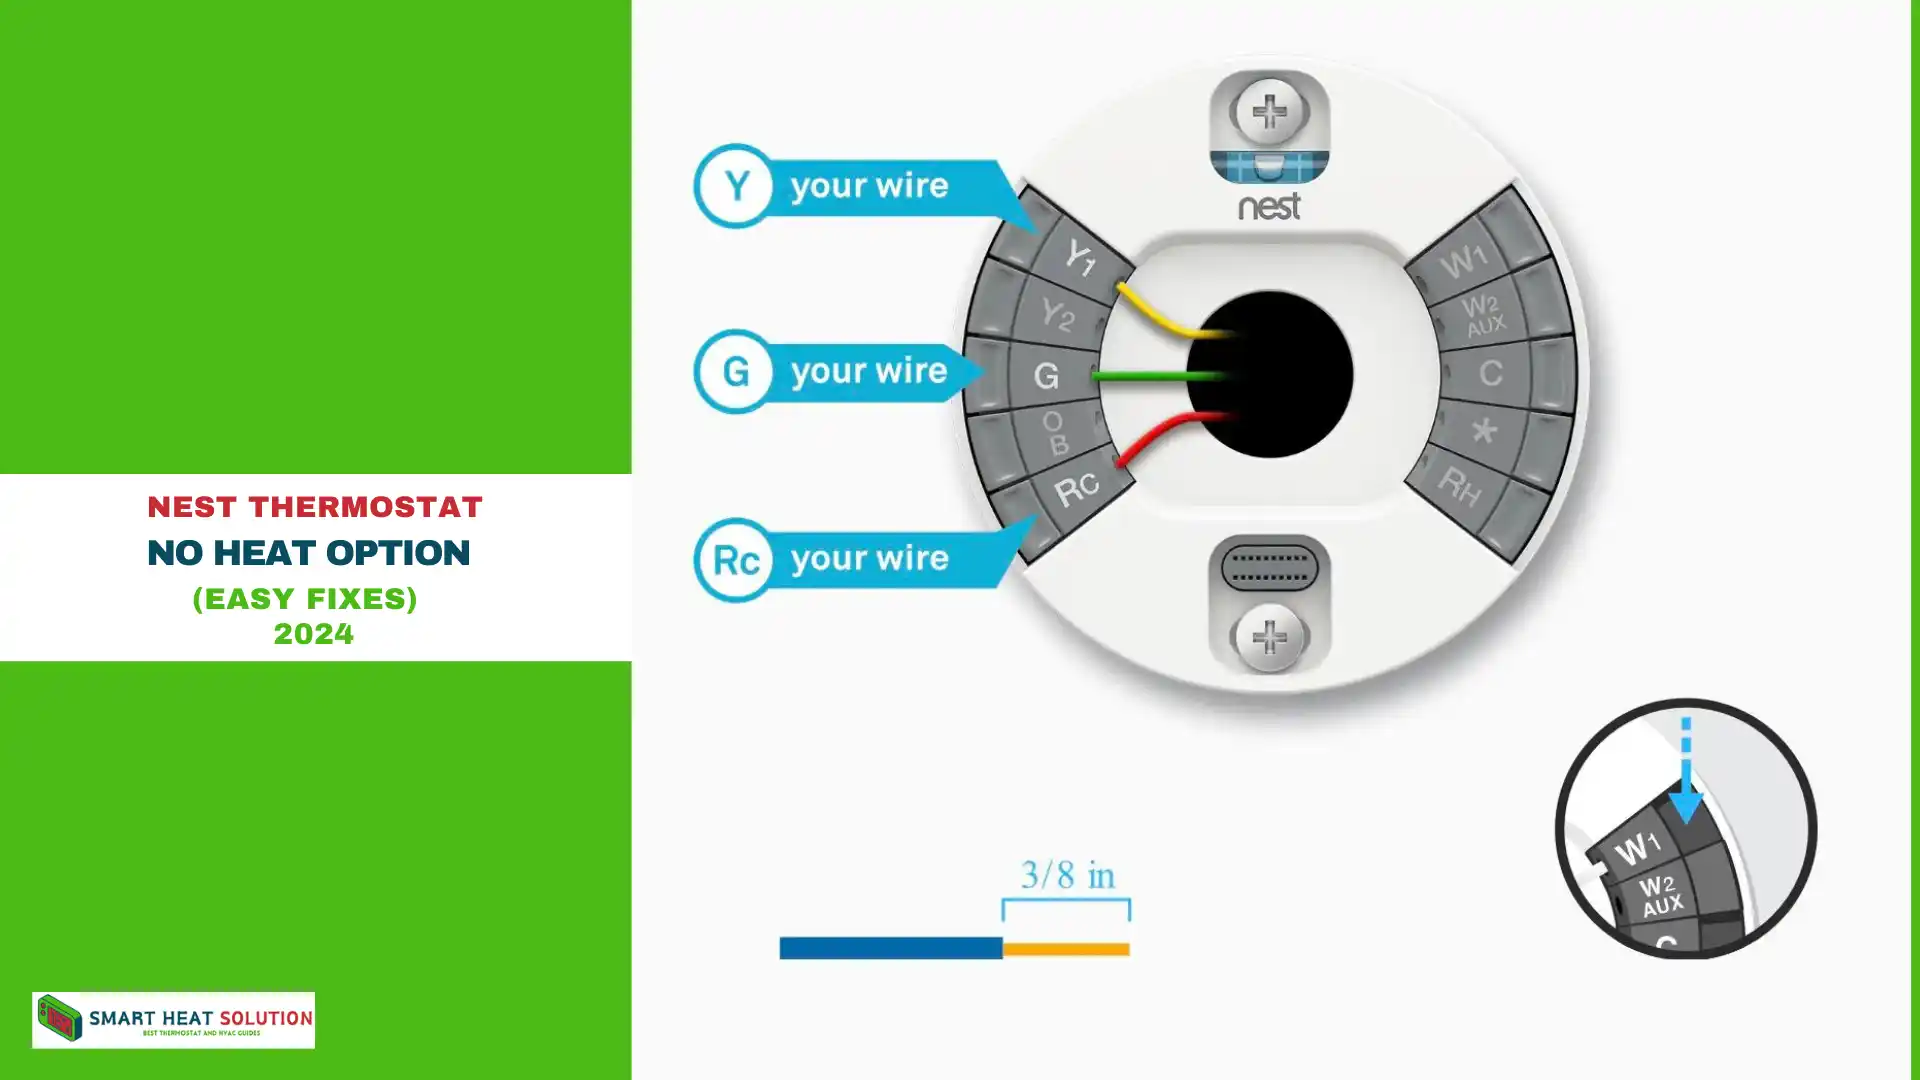
One of the primary culprits for a missing heat option is incorrect or loose wiring. The Nest Thermostat relies on specific wiring configurations to operate correctly. If the heat wire is disconnected, damaged, or improperly connected, the thermostat may fail to recognize your heating system.
Key Points to Check:
- Ensure the W (heat) wire is securely connected to the thermostat base.
- Confirm that all wires are properly seated and tight.
- If you notice any frayed or damaged wires, consider replacing them to restore functionality.
2. Compatibility Problems with HVAC Systems
Not every HVAC system is compatible with the Nest Thermostat, particularly older or proprietary models. While the Nest is designed to work with most modern systems, certain configurations may prevent it from controlling heating effectively.
Checking Compatibility:
- Utilize the Nest Compatibility Checker to verify if your system is supported.
- Be aware that systems like heat pumps may need additional configurations for optimal compatibility.
3. Nest Software Updates and Reset Requirements
Occasionally, software updates can disrupt system functions, or the thermostat may need a reset to properly recognize all available options.
Actions to Take:
- Check for any available software updates for your Nest Thermostat.
- If problems persist after an update, consider performing a factory reset. Remember, this will erase all current settings, so document any important configurations beforehand.
By addressing these common issues, you can restore the heat function on your Nest Thermostat and ensure your home stays comfortable year-round.
Step-by-Step Troubleshooting for Nest Thermostat Heat Issues
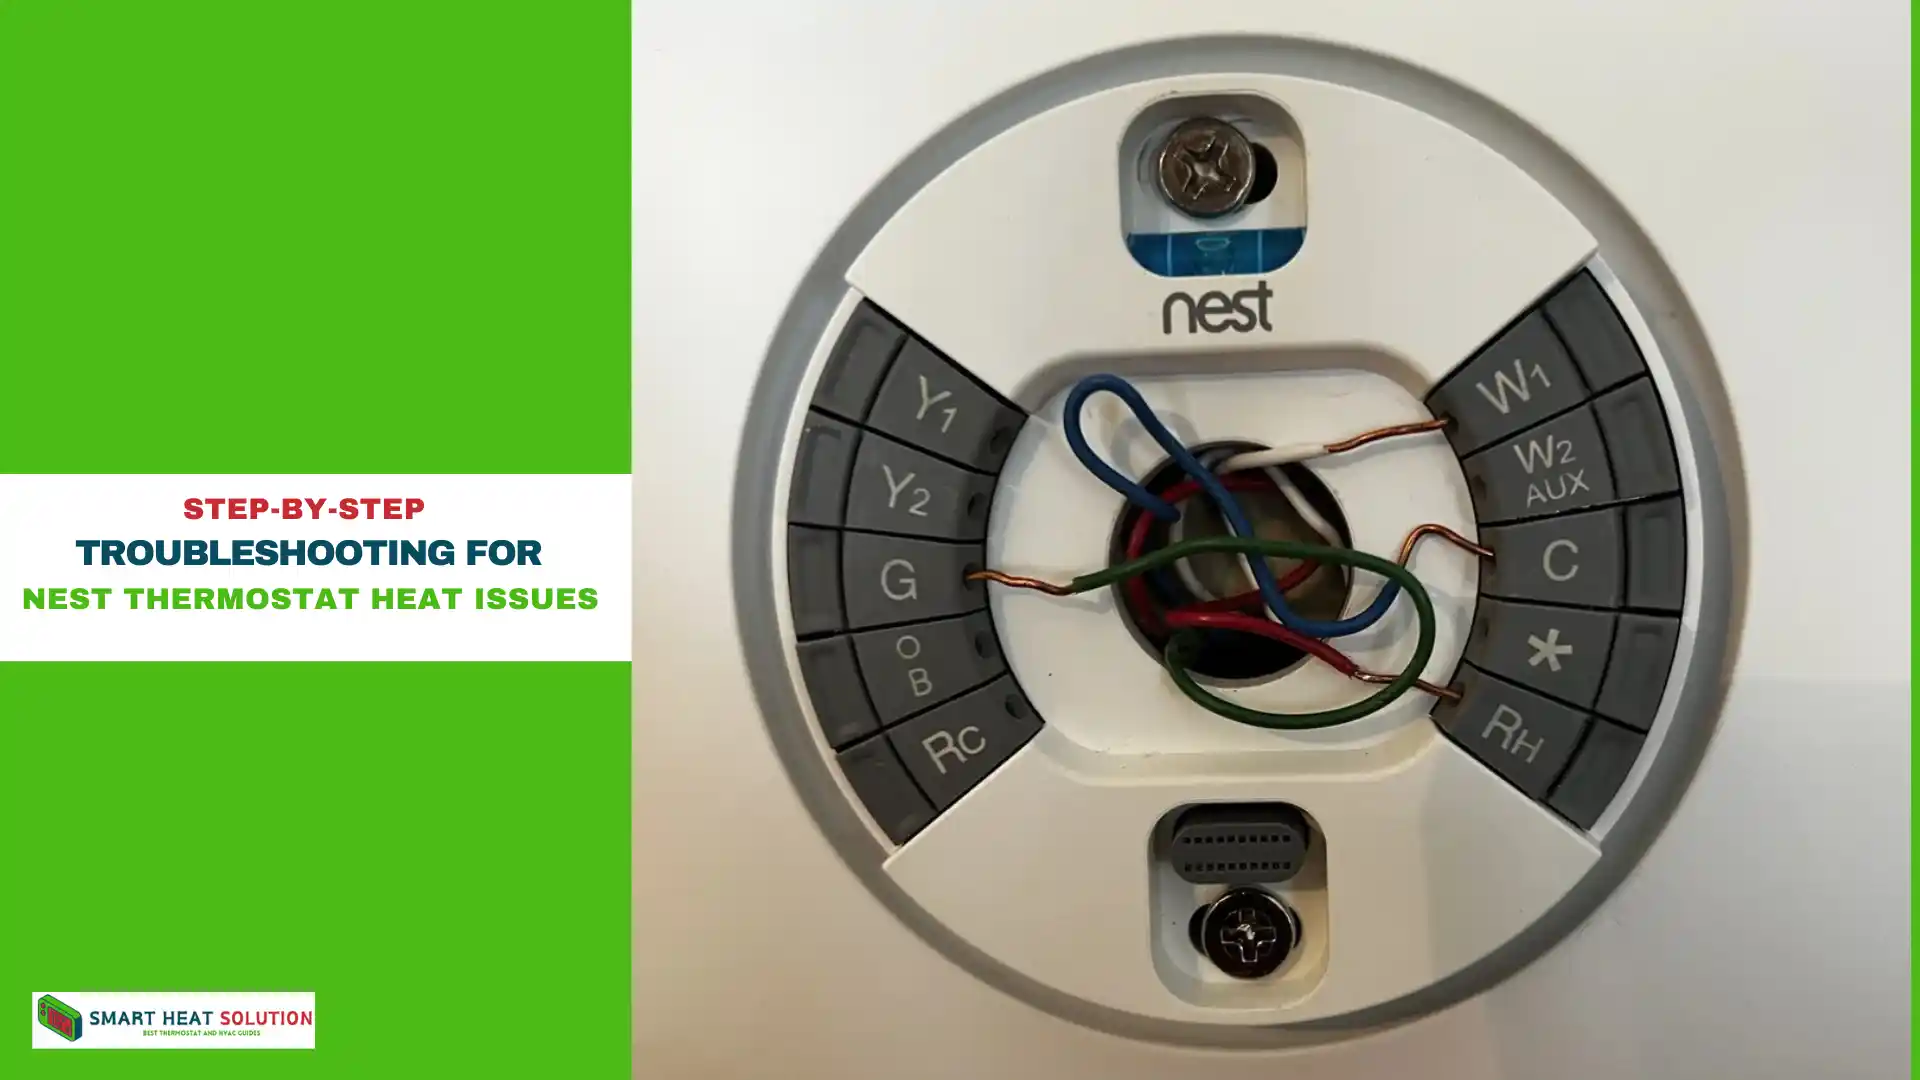
Below is a comprehensive list of troubleshooting methods to address a missing heat option. Follow these steps in sequence for the best results.
1. Check Thermostat Wiring Configuration
How to Inspect Wiring:
- Turn off power to the thermostat to avoid any risk of electrical shock.
- Remove the thermostat faceplate to access the wiring.
- Confirm that the W wire is connected securely and that there are no loose connections.
- Reattach the thermostat faceplate and restore power.
- Verify if the heat option now appears.
If the heat option still does not appear, continue to the next step.
2. Perform a System Reset
If wiring looks correct and the thermostat is compatible, try resetting the system.
How to Perform a Reset:
- Navigate to Settings > Reset > Equipment in the Nest Thermostat menu.
- Choose the option to reset the thermostat and wait for the system to reboot.
- After reset, reconfigure the thermostat to see if the heat option is now available.
3. Check HVAC Compatibility and Thermostat Settings
When the heat option remains missing, the issue may lie in the thermostat’s equipment settings. Verify that the thermostat settings are configured correctly for your specific HVAC system.
Steps to Adjust Settings:
- Go to Settings > Equipment > Continue on your Nest.
- Ensure that your system type (e.g., heat pump, furnace) is accurately represented.
- Follow the prompts to select the type of heat your system uses and save these changes.
How to Set Your Nest Thermostat to Heat Mode
For the Nest Learning Thermostat:
Step 1: Press the thermostat ring to access the Quick View menu.
Step 2: Rotate the ring until you highlight the “Thermostat Off” icon, then press to select it.
Step 3: Turn the ring to choose the “Heat” mode and press to activate it.
Step 4: Press again to confirm your selection.
For a Standard Nest Thermostat:
Step 1: Tap the touch bar to open the Menu view.
Step 2: Slide your finger to “Mode” and tap to select it.
Step 3: Slide your finger to the desired mode, then tap to set it.
For the Nest Thermostat E:
Step 1: Press the thermostat ring to access the Quick View menu.
Step 2: Rotate the ring to select your desired mode, then press to confirm.
Nest Thermostat Models and Heat Option Troubleshooting
Different Nest models have unique capabilities and interfaces that may affect troubleshooting.
Nest Thermostat E and Nest Learning Thermostat
The Nest Thermostat E and Nest Learning Thermostat are compatible with most systems, but older models may have limited support for specific HVAC setups.
- Nest Thermostat E: This model supports single-stage heating and cooling but may encounter issues with complex multi-stage systems.
- Nest Learning Thermostat: Typically compatible with multi-stage systems and advanced configurations, though firmware updates may affect performance.
Basic Nest Thermostat (Newest Generation)
The latest Nest Thermostat has fewer customization options but generally handles basic HVAC configurations effectively. If the heat option is missing, a reset or wiring check is likely the first step.
Additional Troubleshooting: Nest Thermostat Heat Pump Settings
If you have a heat pump system, it may require specialized settings on the Nest Thermostat to display the heat option.
Heat Pump Configuration Steps:
- Go to Settings > Equipment > Heat Pump Balance and check that the thermostat is set to control a heat pump.
- Select the temperature balance mode that best fits your needs (e.g., Max Comfort, Max Savings).
- Save your changes and return to the main screen to see if the heat option appears.
Important: O/B Wire Configuration
For systems with heat pumps, the O/B wire configuration may control the reversing valve. If this wire isn’t correctly set, the thermostat may fail to display the heat option.
Missing W Wire
If your Nest thermostat isn’t displaying or operating the heat option, it could be due to a missing W wire. This often happens during upgrades from older thermostats or if the wire isn’t securely connected. Some older systems may use the B wire in place of the W wire. If your previous thermostat had a B wire but no W wire, connect the B wire to the W connector on your Nest.
W Wire Not Detected
If the setup wizard does not detect your W wire, the heat option won’t appear. To resolve this, open the Nest app and check the connected wires. If the W wire is missing or the terminal looks empty, your heating function won’t work. To fix this, you may need to reset your thermostat to factory settings and re-enter setup mode. Ensure that at least half an inch of wire is exposed for a proper connection.
Misconfigured System Type
Another reason the heat option might be missing is a misconfigured system type. During the initial setup, the setup wizard helps you choose the correct system type. If you mistakenly selected air conditioning instead of a heat pump or furnace, the heat option won’t show up. To correct this, open the Nest app on your mobile device and verify the system type. If it doesn’t match your actual system, reconfigure your thermostat accordingly.
No C Wire Connected
A missing C wire can lead to various issues, including the absence of heat or cool options on your Nest thermostat. The C wire provides continuous power to the thermostat, and while Nest thermostats can function without it, many systems require the C wire for proper operation. If you’re working without a C wire, consider these options:
- Use an unused wire as the C wire.
- Get a Nest Power Connector.
If the C wire isn’t the issue, you may have a defective thermostat. Check our comprehensive guide on installing a thermostat without a C wire for more solutions.
Defective Thermostat
If you’ve tried all troubleshooting steps and the heat option is still missing, your thermostat may be defective. To check for malfunction, you can attempt to bypass the heating function by connecting the G, R, and W terminals (if applicable) and allowing a five-minute delay. If this works, it confirms an issue with your thermostat itself.
How to Verify Heating System Functionality After Fixes
Once you’ve completed troubleshooting steps, it’s important to verify that your heating system is functioning correctly through the thermostat.
Testing Your System:
- Set the thermostat to heat mode and increase the temperature setting to activate the furnace or heat pump.
- Wait for a few minutes to confirm that warm air is being delivered.
- If your HVAC system responds as expected, the thermostat is successfully configured.
When to Contact Professional HVAC Support
If none of these troubleshooting steps work, it’s possible that the thermostat or HVAC system requires a more in-depth diagnosis. In cases where wiring, compatibility, and settings are all correctly configured but the heat option is still missing, consider contacting a certified HVAC professional to investigate further.
Final Thoughts on Nest Thermostat Heat Issues
Understanding how to address a missing heat option on your Nest Thermostat is essential to maintaining comfortable and reliable heating. From checking wiring and system compatibility to adjusting settings and performing resets, these steps cover all major aspects of troubleshooting. By following this guide, you can solve the issue efficiently and get back to enjoying a properly controlled home environment.
Make sure to bookmark this guide for future reference, and consider exploring additional troubleshooting resources from Nest if issues persist.
FAQs
Where can I find the heat option on the Nest Thermostat?
To access the heat option on the Nest Thermostat, go to the main menu or settings. From there, you can select “Heat” mode to activate heating and adjust the temperature to ensure your indoor comfort.
Why isn’t my Nest Thermostat turning on the heat?
If your Nest Thermostat isn’t activating the heat, several factors could be at play:
Power Issues: Check that the thermostat is powered on and that the C-wire is properly connected.
Wi-Fi Connectivity: Ensure your Wi-Fi connection is stable.
Incorrect Settings: Confirm that the thermostat is set to heating mode and the temperature is correctly adjusted.
HVAC System Problems: Inspect your heating system for any malfunctions.
Firmware Updates: Make sure the thermostat’s firmware is up-to-date.
Thermostat Location: Ensure the thermostat is placed away from heat sources for accurate readings.
Why isn’t my Nest Thermostat effectively controlling the heating?
If your Nest Thermostat is not managing the heating properly, consider the following:
Power Issues: Ensure it has power and that the C-wire is connected correctly.
Incorrect Settings: Check that it’s set to heating mode and the desired temperature is set.
Wi-Fi Problems: Look for any issues with your Wi-Fi connection.
HVAC System Issues: Examine your heating system for any faults.
Firmware Updates: Confirm that the thermostat’s firmware is current.
Thermostat Placement: Make sure it’s not positioned near heat sources for accurate temperature readings.
Why is my thermostat set but there’s no heat?
If your thermostat is set but there’s no heat, the issue could be due to:
Power Issues: Ensure the thermostat is powered and the C-wire is connected.
Incorrect Mode: Verify that it’s set to heating mode.
HVAC Problems: Check for any issues with your heating system.
Wiring Issues: Make sure all wires are connected properly.
Firmware Updates: Ensure the thermostat’s firmware is updated.

I’m Alan William’s, the founder of SmartHeatSolution.com. I am from California, USA, I’m passionate about innovative heating technologies and their impact on our homes and businesses. With a background in electrican and home repair , I aim to make smart, energy-efficient heating accessible to everyone. When I’m not writing, I’m likely interested in all the thermostat brands and their new technnology. Thanks for stopping by!

![Honeywell Thermostat Keeps Rebooting: Troubleshooting Guide 8 Honeywell Thermostat Keeps Rebooting Troubleshooting Guide[Fixed]:](https://smartheatsolution.com/wp-content/uploads/2024/10/tinywow_Business-6_66007210-768x432.webp)
