Old Trane Thermostat Wiring To New Thermostat (Easy Guide)
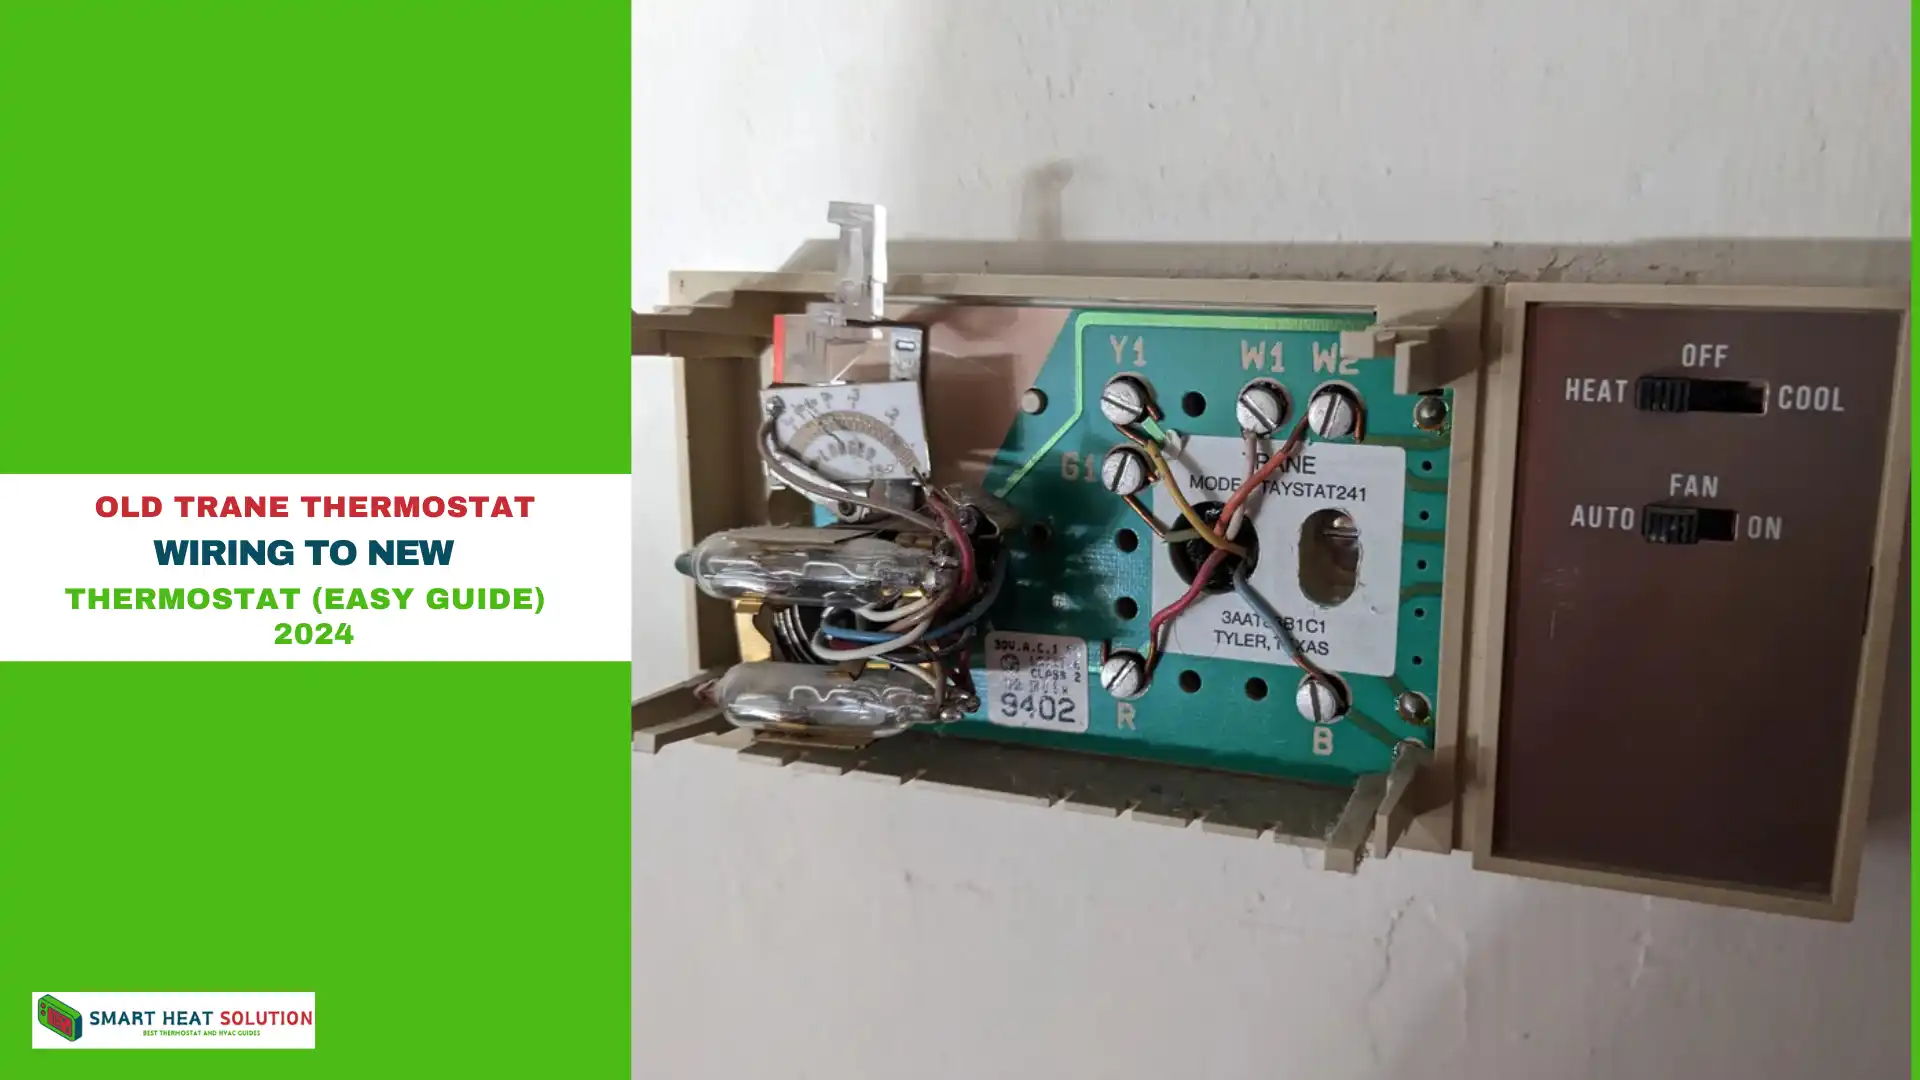
When replacing an old Trane thermostat with a new one, the wiring process is essential for the functionality and efficiency of your HVAC system.
Ensuring proper wiring minimizes potential malfunctions and optimizes temperature control.
Below, we provide an in-depth guide to wiring your old Trane thermostat to a new one, covering every step to make the transition seamless and effective.
Old Trane Thermostat Wiring Color Codes
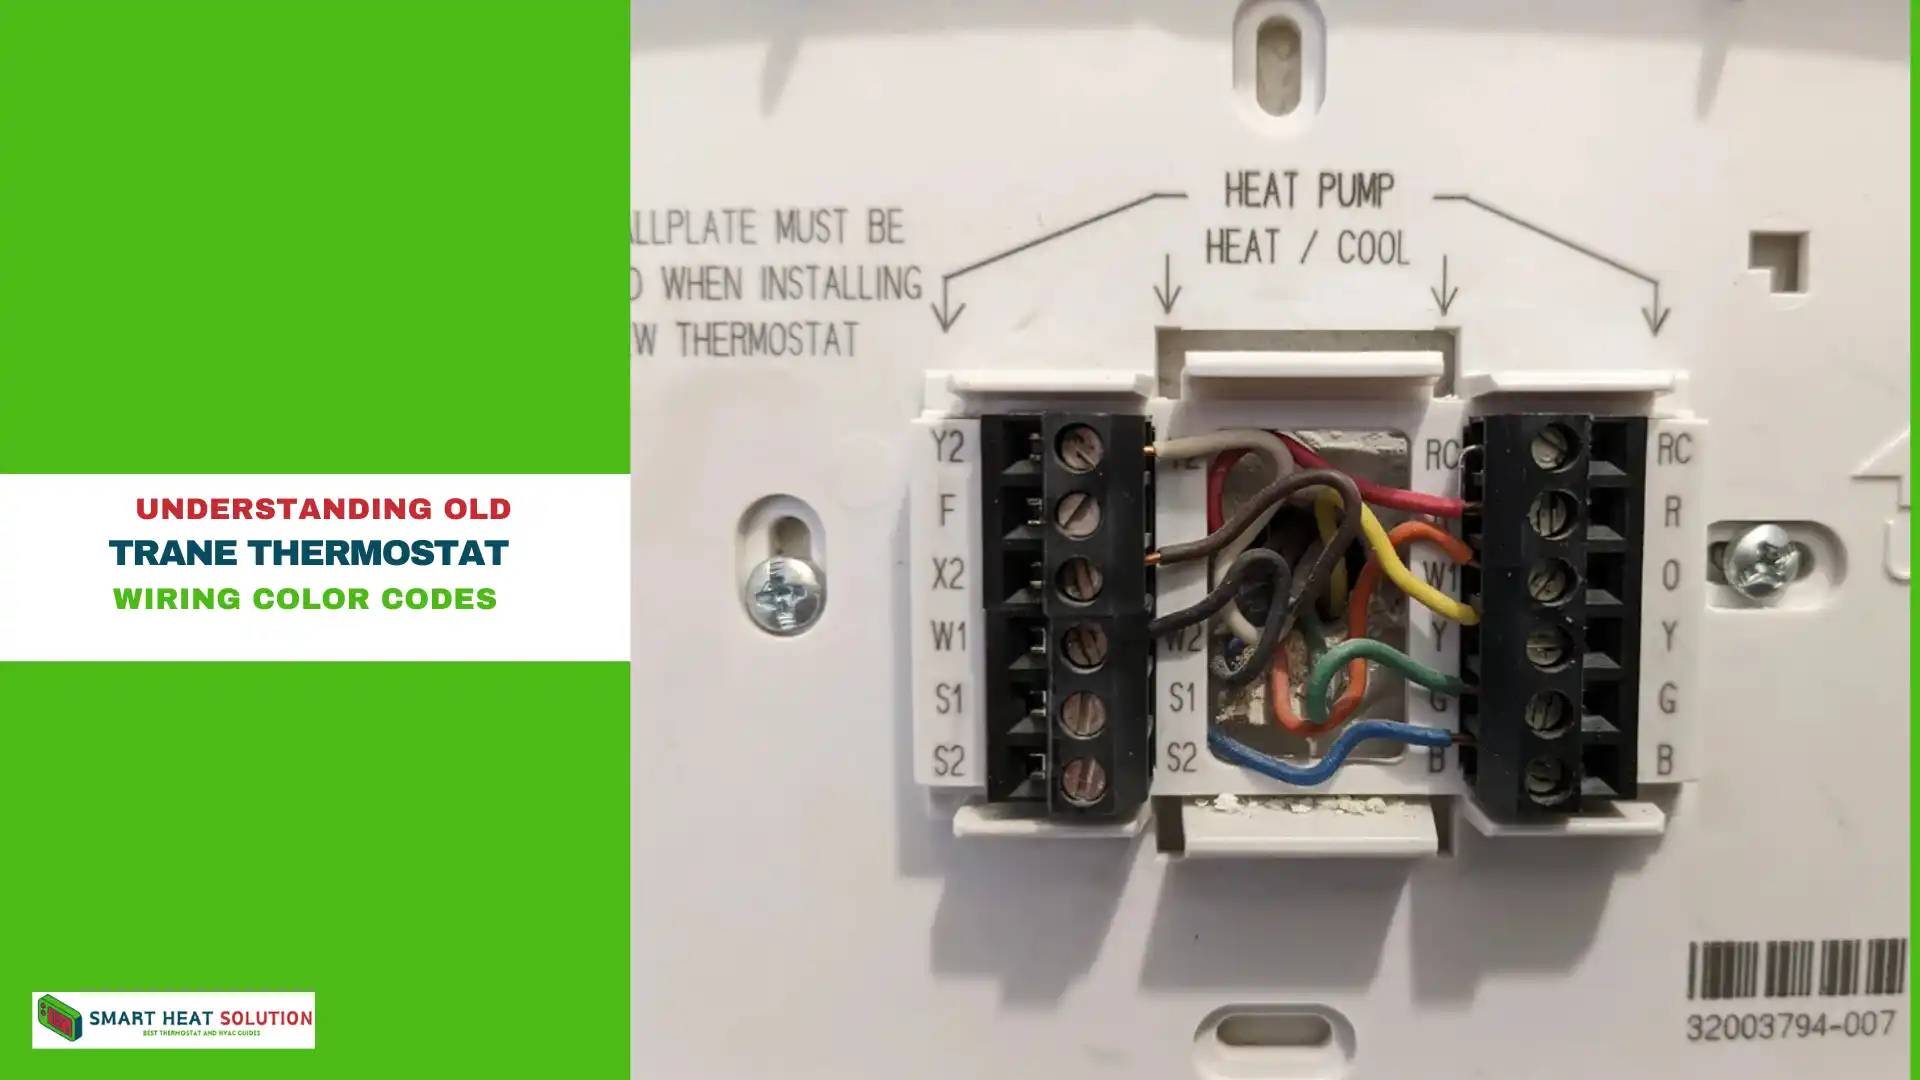
When upgrading your HVAC system by replacing an old Trane thermostat, grasping the wiring color codes is essential. Each wire color corresponds to a specific function, and accurately interpreting these codes ensures a successful installation of your new thermostat.
Common Wire Labels
Your old Trane thermostat will typically feature wires and terminals labeled as follows:
- X1/X2
- W
- B
- O
- G
- R
- Y
Key Wire Functions
Knowing what each label signifies is crucial for connecting your old Trane thermostat to any new Wi-Fi smart thermostat.
| Wire Label | Meaning |
|---|---|
| X2 | Backup or Emergency Heat |
| W | Heat Stage 1 |
| B | Common Wire (C-wire, typically Blue) |
| O | Reversing Valve (Orange) |
| G | Switched Fan Relay (Green) |
| R | 24 VAC Power from the Transformer (Red) |
| Y | Compressor (Yellow) |
| T | Outdoor Temperature Compensation |
| F | Fault Light |
Understanding Specific Wires
- T Terminal: This terminal connects to outdoor temperature compensation for heat anticipator in heat pump mode. You won’t need to wire this on a new programmable thermostat, so it should be safely taped off.
- X2 Wire: Used for emergency heat in your old Trane thermostat, this wire typically connects to the O or AUX terminal on the new thermostat, depending on the brand.
- O Orange Wire: Controls the reversing valve in heat pump systems, determining whether the heat pump operates in heating or cooling mode. This wire will usually connect to the O/B terminal of your new thermostat.
- B Wire: This common wire, often blue, connects to the C terminal of your new thermostat. It provides a continuous 24-volt power supply, powering the thermostat’s display and features.
- G Green Wire: Responsible for controlling the fan or blower, this wire connects to the G terminal of your new thermostat. When activated, it circulates air throughout your space.
- Y Yellow Wire: This wire activates the compressor in cooling systems. It should be connected to the Y terminal on your new thermostat.
- R Red Wire: Typically the power wire supplying 24 volts from the HVAC system to the thermostat, it may connect to either the RC or RH terminal on newer thermostats. If necessary, use a jumper between these terminals, except with Nest thermostats, which do not require this.
- W White Wire: This wire activates the heating system (like a furnace or boiler). Connect it to the W terminal of your new thermostat.
- U Terminal: This terminal is generally unused in typical Trane thermostat configurations.
Why Proper Thermostat Wiring Matters
The correct wiring of your thermostat influences HVAC system efficiency, energy costs, and overall comfort. With the right setup, your system will maintain desired temperatures more accurately and consume less energy, helping you avoid potential damage from incorrect installations.
Tools and Materials Needed
Before beginning the wiring process, gather the necessary tools to ensure accuracy and safety. Here’s what you’ll need:
- Screwdriver set (Phillips and flathead)
- Wire stripper for adjusting wire lengths
- Voltage tester to ensure safe handling
- Wire labels or tape for marking connections
- Thermostat wiring diagram (specific to your new model)
- Digital multimeter for measuring voltage if needed
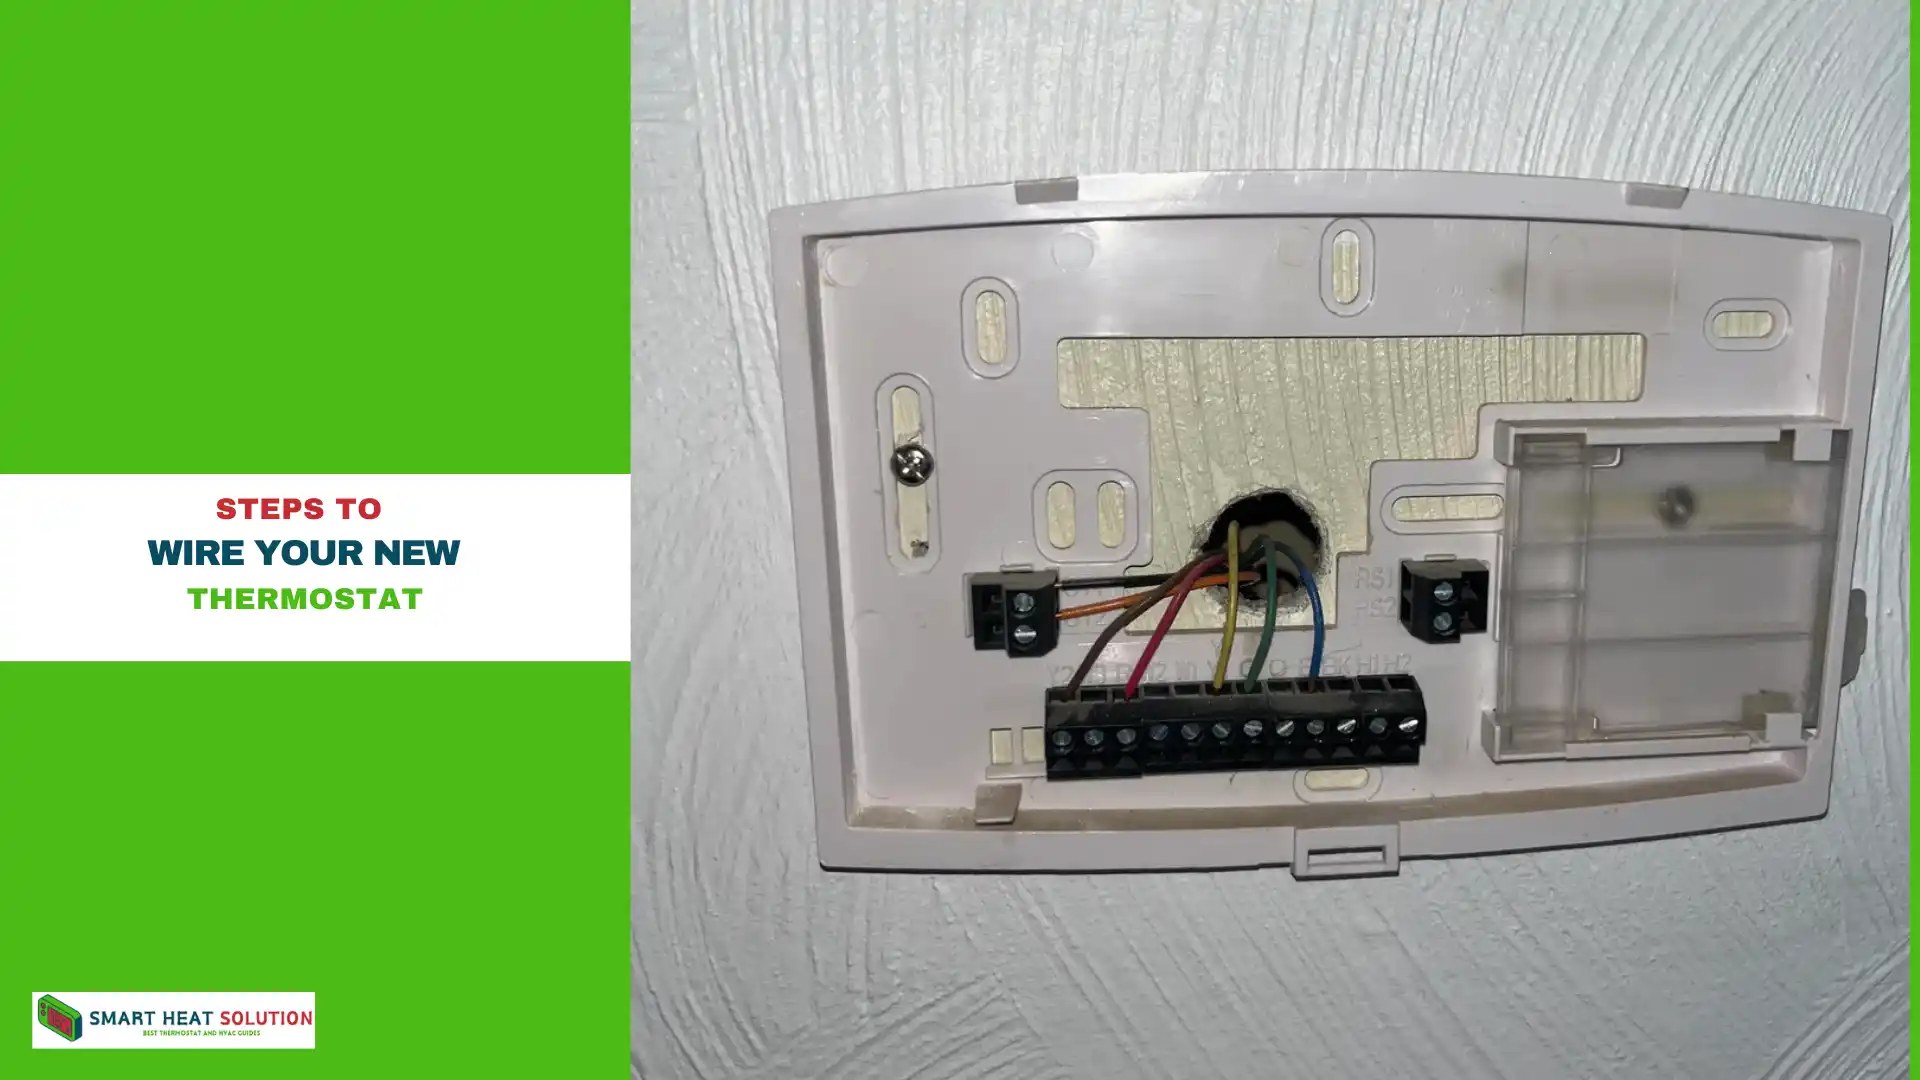
Steps to Wire Your New Thermostat
Step 1: Turn Off Power to Your HVAC System
Safety first. Locate the HVAC system breaker on your main electrical panel and switch it off. Use a voltage tester to verify that power is off at the thermostat.
Step 2: Remove the Old Trane Thermostat
- Unscrew the faceplate of the old thermostat carefully.
- Inspect and label each wire according to its function and color.
- Take a photo of the current wiring setup for reference.
- Detach the wires from the old thermostat and remove the wall plate.
Step 3: Prepare the New Thermostat
Unpack the new thermostat and review its wiring diagram. Most modern thermostats include a conversion table to match old wire labels with their updated functions.
Step 4: Connect Wires to the New Thermostat
- Insert each wire into its designated terminal, following the new thermostat’s wiring guide.
- Connect the Common (C) Wire: Many new thermostats require a C wire for consistent power.
- If your system lacks a C wire, consult your HVAC manual or use a compatible power extender kit.
- Secure each wire, ensuring no exposed metal touches other terminals.
- Mount the new thermostat’s backplate to the wall.
5. Match Wires to the New Thermostat’s Terminals
Using your labeled wires, match each wire to the corresponding terminal on the new thermostat. The table below can serve as a reference:
| Old Wire Label | New Thermostat Terminal | Function |
|---|---|---|
| R | R/Rc/Rh | Power for heating or cooling |
| C | C | Common wire |
| Y | Y/Y1 | Cooling |
| G | G | Fan control |
| W | W/W1 | Heating |
| O/B | O/B | Heat pump reversing valve |
6. Test the System
Once you’ve connected all wires, turn the power back on and test the system. Set the thermostat to cooling and heating modes to verify that both functions operate correctly.
Transitioning to a Honeywell Wi-Fi Thermostat
If you’re upgrading from an old Trane thermostat to a Honeywell Wi-Fi thermostat, you’ll benefit from enhanced energy efficiency, smart home integration, and advanced features.
Here’s how the old Trane wiring maps to the Honeywell Wi-Fi thermostat:
| Old Thermostat Wires | Color | New Honeywell Thermostat |
|---|---|---|
| R | Power from Transformer | R |
| X2 | Auxiliary Heat | E/Aux |
| Y | Compressor Relay | Y |
| G | Fan | G |
| O | Reversing Valve | O/B |
| B | Common Wire | C |
| W | Heat | E/Aux |
Troubleshooting Common Issues
Even with proper wiring, issues can arise. Here’s how to address common problems:
No Power to Thermostat
- Check the Circuit Breaker: Confirm that the breaker is not tripped.
- Inspect Wire Connections: Ensure all wires are securely attached.
- Test Transformer: Use a multimeter to verify the transformer is providing adequate power.
Incorrect Temperature Readings
- Re-calibrate the Thermostat: Most thermostats have a calibration feature to ensure accurate readings.
- Check Placement: Ensure the thermostat is not installed near heat sources, windows, or vents.
Fan or System Runs Continuously
- Inspect the G Wire Connection: The fan wire may be misconnected, causing it to run without stopping.
- Confirm Thermostat Settings: Ensure the thermostat mode is correctly set to “Auto.”
Choosing the Right New Thermostat Model
Upgrading your thermostat can improve energy efficiency and convenience. Here are popular types to consider:
- Programmable Thermostats: Great for scheduling temperature changes and lowering energy bills.
- Smart Thermostats: These can learn preferences and can be controlled remotely via smartphone apps.
- Non-Programmable Thermostats: Simple to use and cost-effective for manual temperature adjustments.
Benefits of a Modern Thermostat
Switching to a newer thermostat brings advanced control, such as:
- Programmable Schedules: Reduce energy consumption with automatic adjustments.
- Remote Access: Adjust settings from a smartphone or other devices.
- Energy Savings: Advanced sensors optimize HVAC efficiency.
FAQ: Old Trane Thermostat Wiring
Can I replace a Trane thermostat with a generic brand?
Yes, most thermostats are compatible with standard HVAC systems, but verify compatibility with your specific model.
What if my thermostat has more or fewer wires?
This can happen based on the system’s complexity. Refer to your HVAC system manual or consult a technician for proper configuration.
Do I need a C-wire for my new thermostat?
Most smart thermostats require a C-wire for power, but some models have power-extender kits as an alternative.
Conclusion
Successfully wiring a new thermostat to replace an old Trane model can seem daunting, but with the right information and preparation, it can be a straightforward process. By following this comprehensive guide, you can enhance your home’s energy efficiency and ensure your HVAC system operates optimally. If you encounter difficulties, don’t hesitate to consult a professional.
For those looking to further improve their home technology and optimize their energy consumption, understanding thermostat wiring is just the beginning.
Read also: Justanswer.com

I’m Alan William’s, the founder of SmartHeatSolution.com. I am from California, USA, I’m passionate about innovative heating technologies and their impact on our homes and businesses. With a background in electrican and home repair , I aim to make smart, energy-efficient heating accessible to everyone. When I’m not writing, I’m likely interested in all the thermostat brands and their new technnology. Thanks for stopping by!

