High Superheat and Low Subcooling Troubleshooting
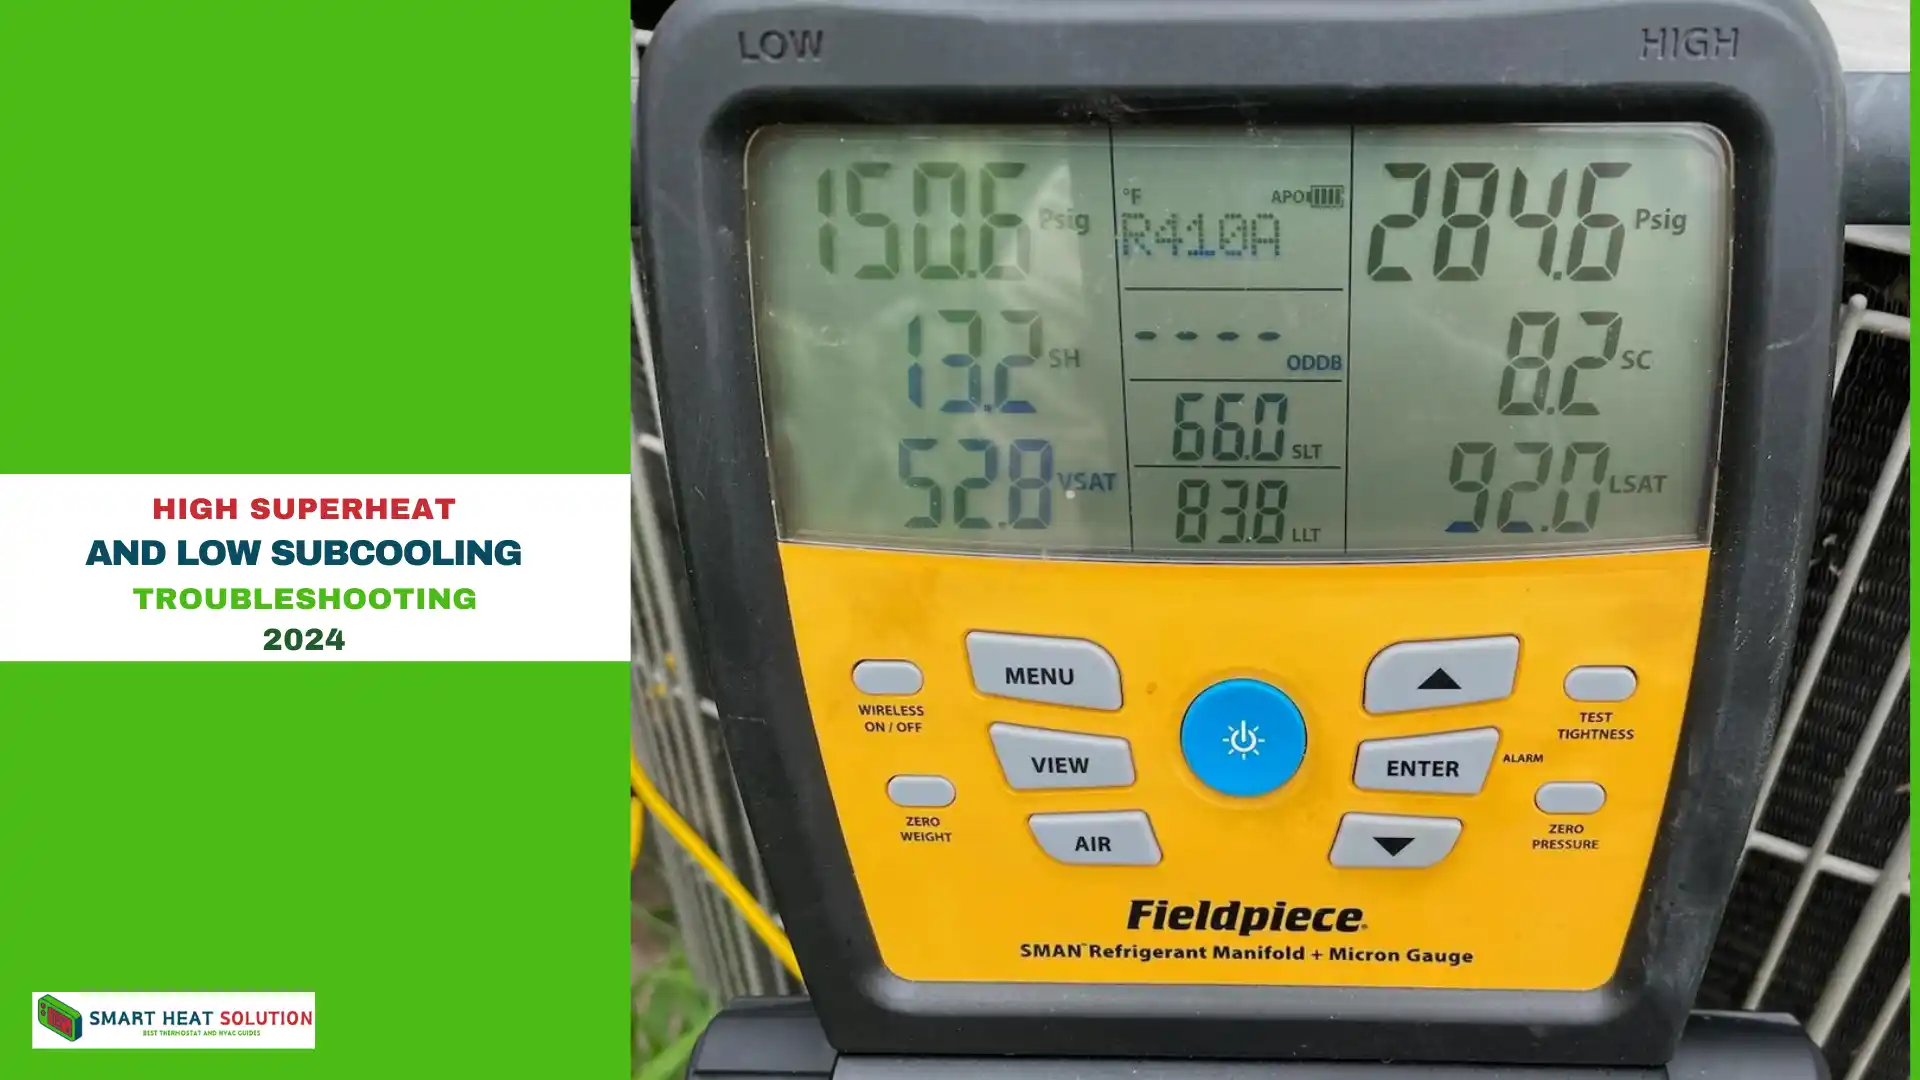
Is your refrigeration system acting up with high superheat and low subcooling?
These are red flags that can reduce efficiency, spike energy costs, and even lead to system failures. Whether you’re an HVAC/R tech, facility manager, or business owner, it’s essential to tackle these issues quickly.
This troubleshooting guide breaks down the causes, offers expert tips, and gives step-by-step solutions to get your system running smoothly again. Dive in to optimize performance, avoid costly repairs, and keep everything cool.
What is Superheat?
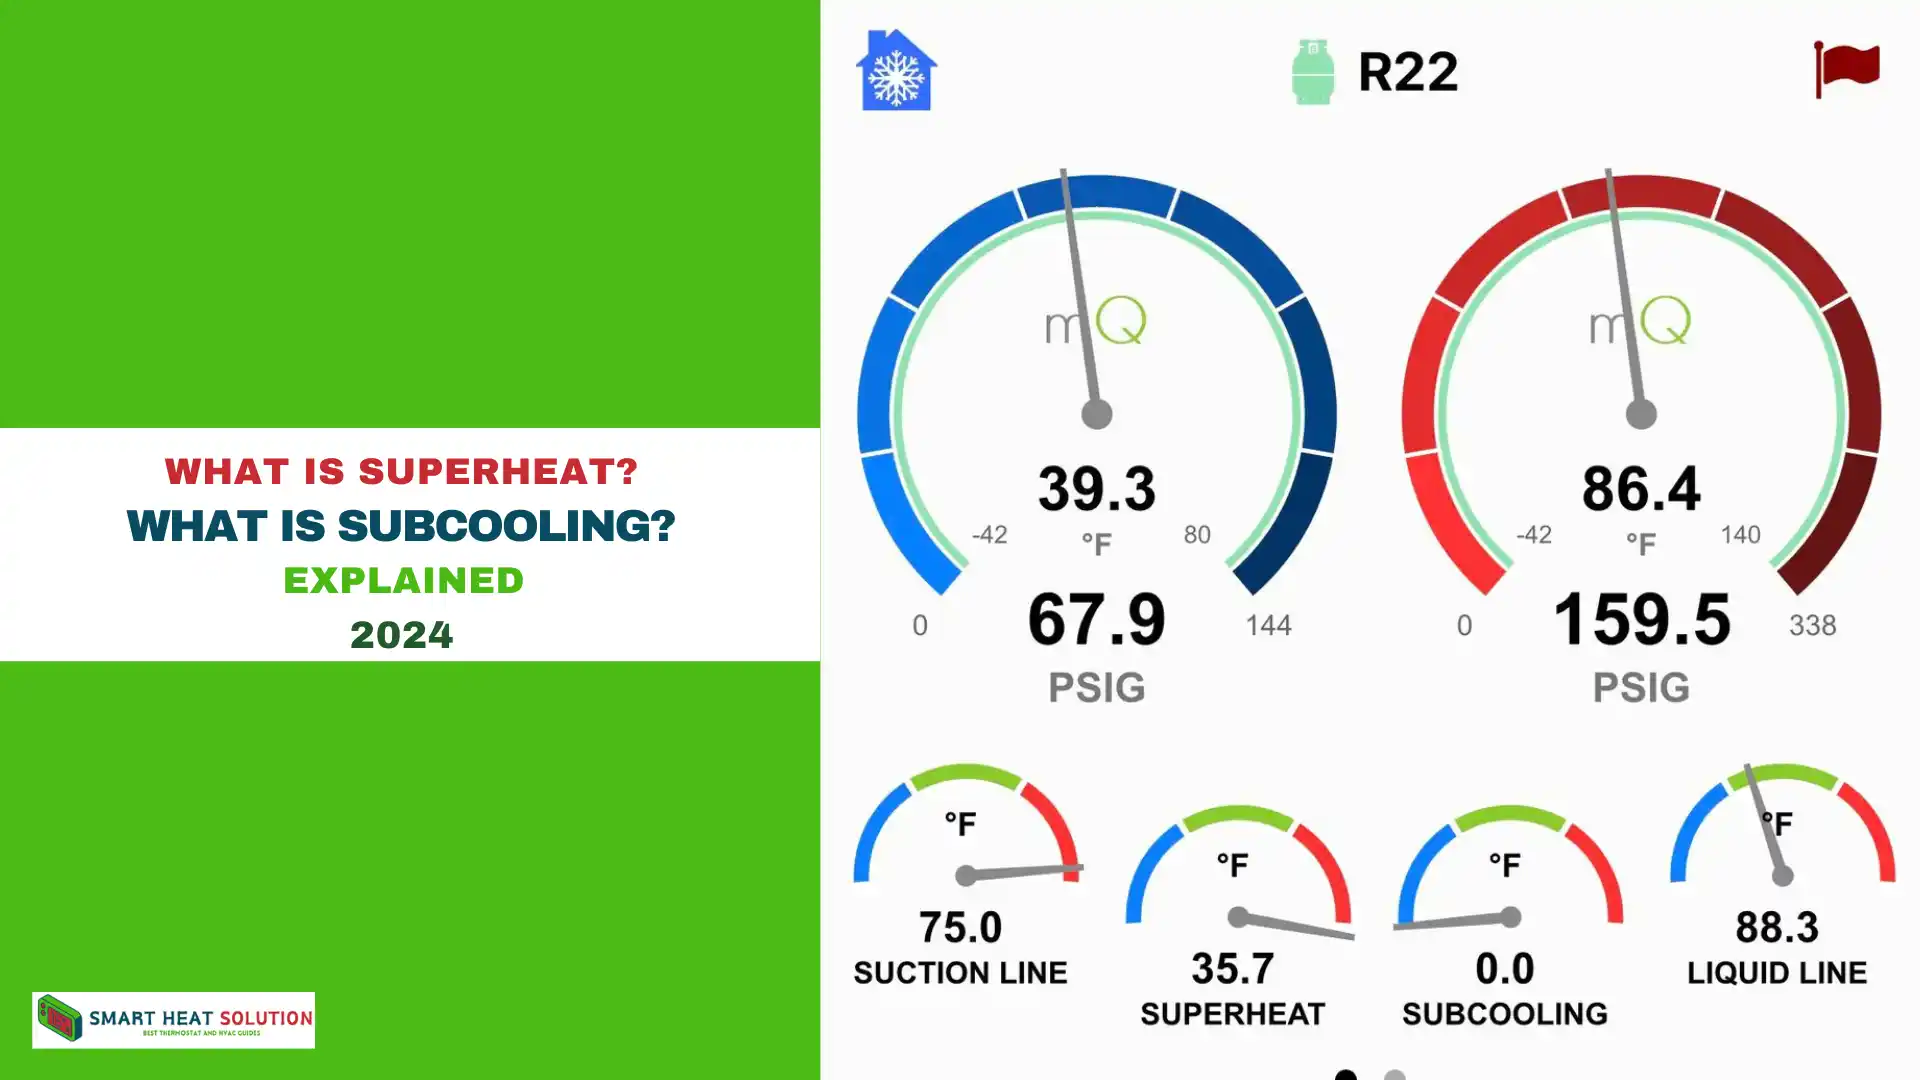
Superheat refers to the temperature of refrigerant vapor once it has completely evaporated in the evaporator coil. Essentially, it’s the difference between the current refrigerant temperature and its boiling point at a given pressure. For proper system operation, superheat needs to be within a specific range, depending on the equipment and conditions.
Key Points:
- Superheat ensures that no liquid refrigerant returns to the compressor, protecting it from damage.
- High superheat indicates that the refrigerant gas is too warm, which can reduce efficiency and damage components over time.
What is Subcooling?
Subcooling occurs when refrigerant is cooled below its condensation temperature, leaving the condenser as a liquid. This process is crucial for the refrigerant to function effectively in the evaporator.
Key Points:
- Subcooling improves system efficiency, as it allows more liquid refrigerant to enter the evaporator.
- Low subcooling indicates that the refrigerant charge is low or that there may be an issue with heat rejection in the condenser.
Common Causes of High Superheat
Several issues can cause high superheat, leading to poor system performance. These causes can be categorized into airflow issues, refrigerant issues, and component malfunctions.
1. Low Refrigerant Charge
A common cause of high superheat is insufficient refrigerant. When the refrigerant charge is too low, the evaporator coil doesn’t receive enough liquid refrigerant. As a result, the refrigerant vaporizes too early in the coil, causing the superheat to rise.
Symptoms of Low Refrigerant Charge:
- High superheat readings.
- Inefficient cooling performance.
- Evaporator coil freezing.
- Compressor overheating.
Solutions:
- Measure the refrigerant charge with gauges to ensure it matches the manufacturer’s specifications.
- Check for leaks in the system using a leak detector and seal them as necessary.
- Recharge the system with the proper amount of refrigerant.
2. Restricted Flow in the Evaporator
If airflow through the evaporator is restricted, either by a dirty air filter, blocked vents, or improper fan settings, the coil cannot absorb enough heat, causing the refrigerant to overheat.
Symptoms of Restricted Airflow:
- High superheat readings.
- Uneven cooling or inadequate cooling in certain areas.
- Reduced air velocity from vents.
- Frozen evaporator coil.
Solutions:
- Clean or replace dirty air filters.
- Ensure that all vents are open and unobstructed.
- Check the blower fan for proper operation and adjust as needed.
3. Undersized or Malfunctioning Expansion Valve
The Thermostatic Expansion Valve (TXV) or Electronic Expansion Valve (EXV) controls the flow of refrigerant into the evaporator. If the valve is undersized or malfunctioning, it can restrict the flow of refrigerant, leading to high superheat.
Symptoms of TXV/EXV Issues:
- High superheat despite correct refrigerant charge.
- Fluctuating temperatures in the evaporator.
- Reduced cooling performance.
Solutions:
- Test the expansion valve for proper operation.
- Replace the TXV or EXV if malfunctioning.
- Ensure that the valve is correctly sized for the system.
Common Causes of Low Subcooling
Low subcooling generally points to refrigerant issues or condenser problems, as insufficient heat removal prevents the refrigerant from cooling down properly after leaving the condenser.
1. Low Refrigerant Charge
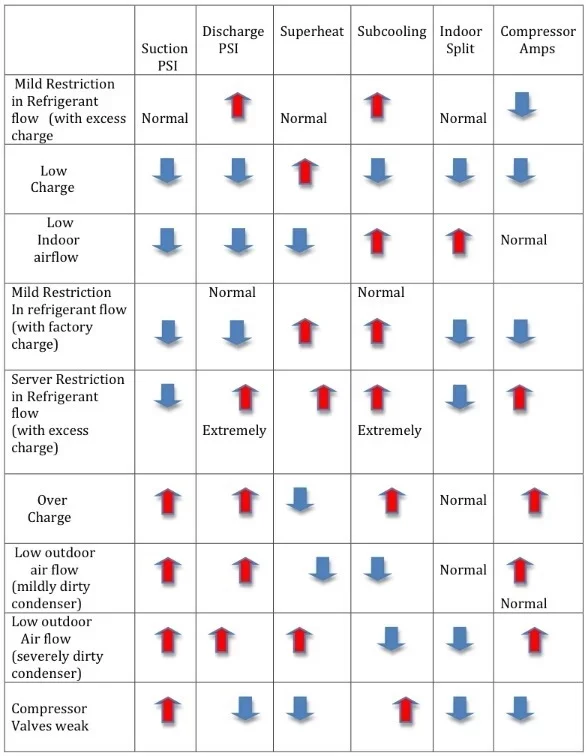
Just as low refrigerant can cause high superheat, it can also result in low subcooling. When the system lacks sufficient refrigerant, there isn’t enough liquid refrigerant to create the proper pressure differential, leading to inadequate subcooling.
Symptoms of Low Refrigerant Charge:
- Low subcooling readings.
- Poor cooling capacity.
- Increased energy consumption.
- Compressor running hot.
Solutions:
- Perform a refrigerant pressure test.
- Locate and repair leaks in the system.
- Recharge the refrigerant to proper levels.
2. Dirty or Blocked Condenser Coils
When the condenser coils are dirty or blocked, they cannot reject heat efficiently, resulting in insufficient cooling of the refrigerant. This leads to low subcooling as the refrigerant remains too warm when it leaves the condenser.
Symptoms of Dirty Condenser Coils:
- Low subcooling.
- High head pressure.
- Increased compressor strain.
- Higher energy bills.
Solutions:
- Clean the condenser coils regularly to remove dirt, debris, and grime.
- Check for obstructions around the condenser unit and clear any blockages.
- Ensure that the condenser fan is functioning properly and replace it if needed.
3. Oversized System
In some cases, an HVAC system that is too large for the space it’s servicing can lead to low subcooling. This happens because the oversized system short cycles, meaning it doesn’t run long enough to allow for proper heat exchange in the condenser.
Symptoms of an Oversized System:
- Low subcooling readings.
- Short, frequent cycles.
- Temperature fluctuations in conditioned spaces.
- Increased wear and tear on the compressor.
Solutions:
- Evaluate the system size to ensure it matches the building load.
- Consider replacing an oversized system with a properly sized unit for optimal efficiency.
- Use variable-speed compressors to improve heat exchange and avoid short cycling.
The Role of Thermodynamics in HVAC Performance
At the core of your HVAC system is thermodynamics—the science behind heat transfer. Understanding this allows you to better grasp what’s happening inside your unit and why maintaining balanced superheat and subcooling levels is crucial for efficient operation.
Essential Tools for Troubleshooting
To troubleshoot high superheat and low subcooling, you’ll need the following tools:
- Pressure Gauges: For measuring refrigerant levels.
- Thermometers: To track temperatures at key points in your system.
- Multimeter: To test electrical components and connections.
How to Troubleshoot High Superheat and Low Subcooling
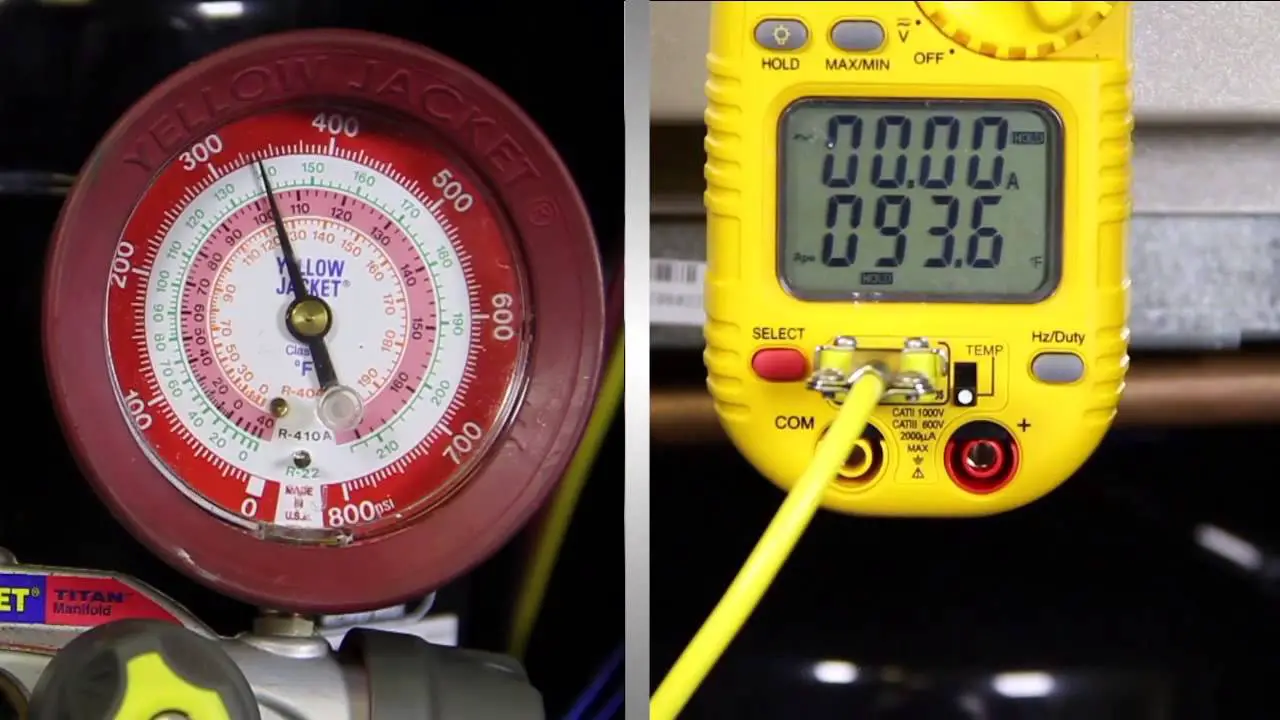
Understanding the relationship between superheat and subcooling is essential in diagnosing HVAC system problems. If you’re experiencing both high superheat and low subcooling, it often points to refrigerant charge issues or problems within the evaporator and condenser.
1. Check the Refrigerant Charge
The first step in troubleshooting these conditions is to ensure the system has the correct amount of refrigerant. Undercharging or overcharging can cause both high superheat and low subcooling.
- Use a refrigerant gauge to measure the current charge.
- Compare the readings to the manufacturer’s specifications.
- Add or remove refrigerant as needed to achieve proper charge levels.
2. Inspect the Evaporator and Condenser Coils
Dirty or blocked coils can severely impact both superheat and subcooling levels. Poor heat absorption in the evaporator can cause high superheat, while poor heat rejection in the condenser can lead to low subcooling.
- Clean the coils regularly as part of routine maintenance.
- Check the airflow to ensure there are no obstructions.
- Replace any malfunctioning fans or motors that affect coil performance.
3. Evaluate the Expansion Valve
If the expansion valve is not operating correctly, it may restrict refrigerant flow, leading to high superheat in the evaporator. This can also affect subcooling as the refrigerant is not properly managed through the system.
- Test the expansion valve and replace it if necessary.
- Ensure the valve is properly sized and configured for the system load.
Step-by-Step Fix for High Superheat
Step 1: Check Refrigerant Levels
Low refrigerant is one of the most common causes of high superheat. Use a manifold gauge to measure the pressure and add refrigerant carefully if it’s below the recommended level.
Step 2: Clean or Replace Filters
Clogged filters can severely restrict airflow, causing an increase in superheat. Check your filters monthly and replace them as needed, especially during heavy use periods.
Step 3: Inspect and Adjust the Expansion Valve
The expansion valve controls the flow of refrigerant into your evaporator coil. If it’s malfunctioning, superheat levels can spike. Inspect the valve for any signs of damage or clogging, and make adjustments or replacements as necessary.
Step-by-Step Fix for Low Subcooling
Step 1: Evaluate the Condenser Coil
A dirty or blocked condenser coil reduces subcooling by limiting the system’s ability to transfer heat. Clean the coils using a coil cleaner and make sure the surrounding area is free from obstructions.
Step 2: Test for Overcharge
Overcharging the refrigerant can lead to low subcooling. Use a pressure gauge to check for overpressure, and if necessary, carefully remove excess refrigerant to restore balance.
Step 3: Examine the Liquid Line
If the liquid line isn’t cold to the touch, there could be a kink or obstruction affecting the flow of refrigerant. Straighten or replace the line to ensure proper circulation.
Preventative Maintenance for Your HVAC System
Taking proactive steps can help you avoid issues like high superheat and low subcooling before they become costly problems.
Regular Maintenance
Schedule routine checks for refrigerant levels, clean coils, and replace filters to keep your HVAC system running smoothly. A good rule of thumb is to inspect the system at least once a year, preferably before peak seasons.
Call in the Pros
Some issues might be beyond DIY fixes. If you’ve tried these solutions and still can’t balance your system, it’s time to call an HVAC professional. They can quickly diagnose and repair more complex problems.
Upgrade Your System
If your system is older and you’re facing frequent issues, consider upgrading to a more efficient, modern unit. Newer models come with advanced diagnostics and energy-saving features that can make maintenance easier and reduce your energy costs.
FAQs
Q: How can I tell if my system is overcharged with refrigerant?
A: Look for signs like frosting on the evaporator coils or hearing bubbling sounds from the liquid line.
Q: When should I call an HVAC professional?
A: If you’ve checked refrigerant levels, filters, and the expansion valve but still face problems, it’s best to get a professional to take a look.
Q: How often should I replace my air filters?
A: Aim for every 1-3 months, depending on your system’s usage and the type of filter.
Q: What’s the ideal superheat and subcooling level?
A: Superheat should be between 5°F and 15°F, while subcooling should range from 10°F to 20°F.
Q: Can regular maintenance extend my HVAC unit’s life?
A: Yes, consistent maintenance can catch issues early and keep your system running efficiently, potentially adding years to its lifespan.
Conclusion
High superheat and low subcooling are clear indicators that your HVAC system is not performing efficiently. Proper diagnosis and regular maintenance are key to resolving these issues, ensuring that your system operates at peak performance. By understanding the underlying causes, such as refrigerant charge, airflow issues, and component malfunctions, we can effectively troubleshoot and restore optimal system performance.

I’m Alan William’s, the founder of SmartHeatSolution.com. I am from California, USA, I’m passionate about innovative heating technologies and their impact on our homes and businesses. With a background in electrican and home repair , I aim to make smart, energy-efficient heating accessible to everyone. When I’m not writing, I’m likely interested in all the thermostat brands and their new technnology. Thanks for stopping by!

